The process of creating packages with the PSADT Package Wizard is straight forward. Right-click on the packages folder in the upper left corner.
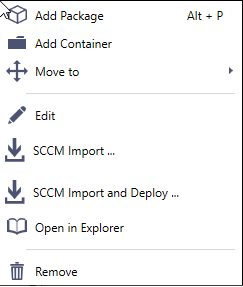
You can create a new folder inside the root folder or click on Add Package (Alt+P).
STEP 1 - Package
A new window opens. This is the first step of the packaging process.
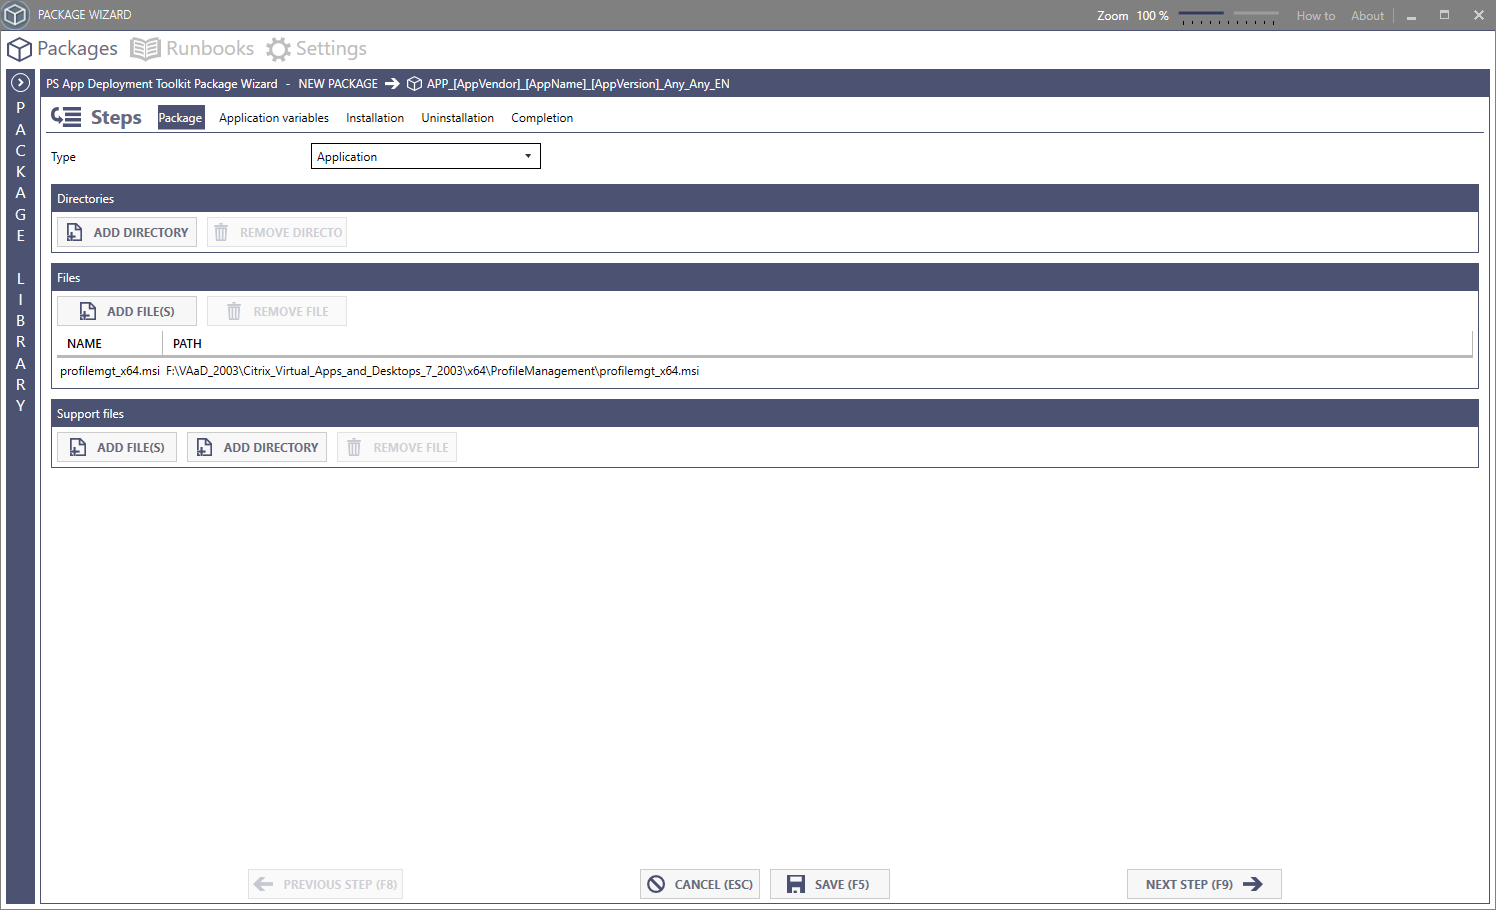
Choose the type of the package. You can choose between:
- Application
- User Configuration
- System Configuration
- Driver
Depending on what you choose the folder for the new PSADT Package is automatically prefixed with.
- APP
- USR
- SYS
- DRV
Let´s choose Application for this packaging example. Now we need to include the binaries of the application. Installation files are stored in the Files directory, Support files (e.g. transforms files or license files) in Support Files. Choose ADD Directory of you want to add directories with sub folders or choose ADD FILES if you want to add a single installer file.
In this example we will add a simple msi file: profilemgmt_x64.msi. You can see it in the files overview (as shown in the screenshot above). Now click on NEXT STEP or press F9.
Application Variables
In this section we will configure the PSADT application variables. These variables are used to create the final folder name. In this case: “APP_Citrix_Profilemanagement_203025008_W10_x64_Any”.
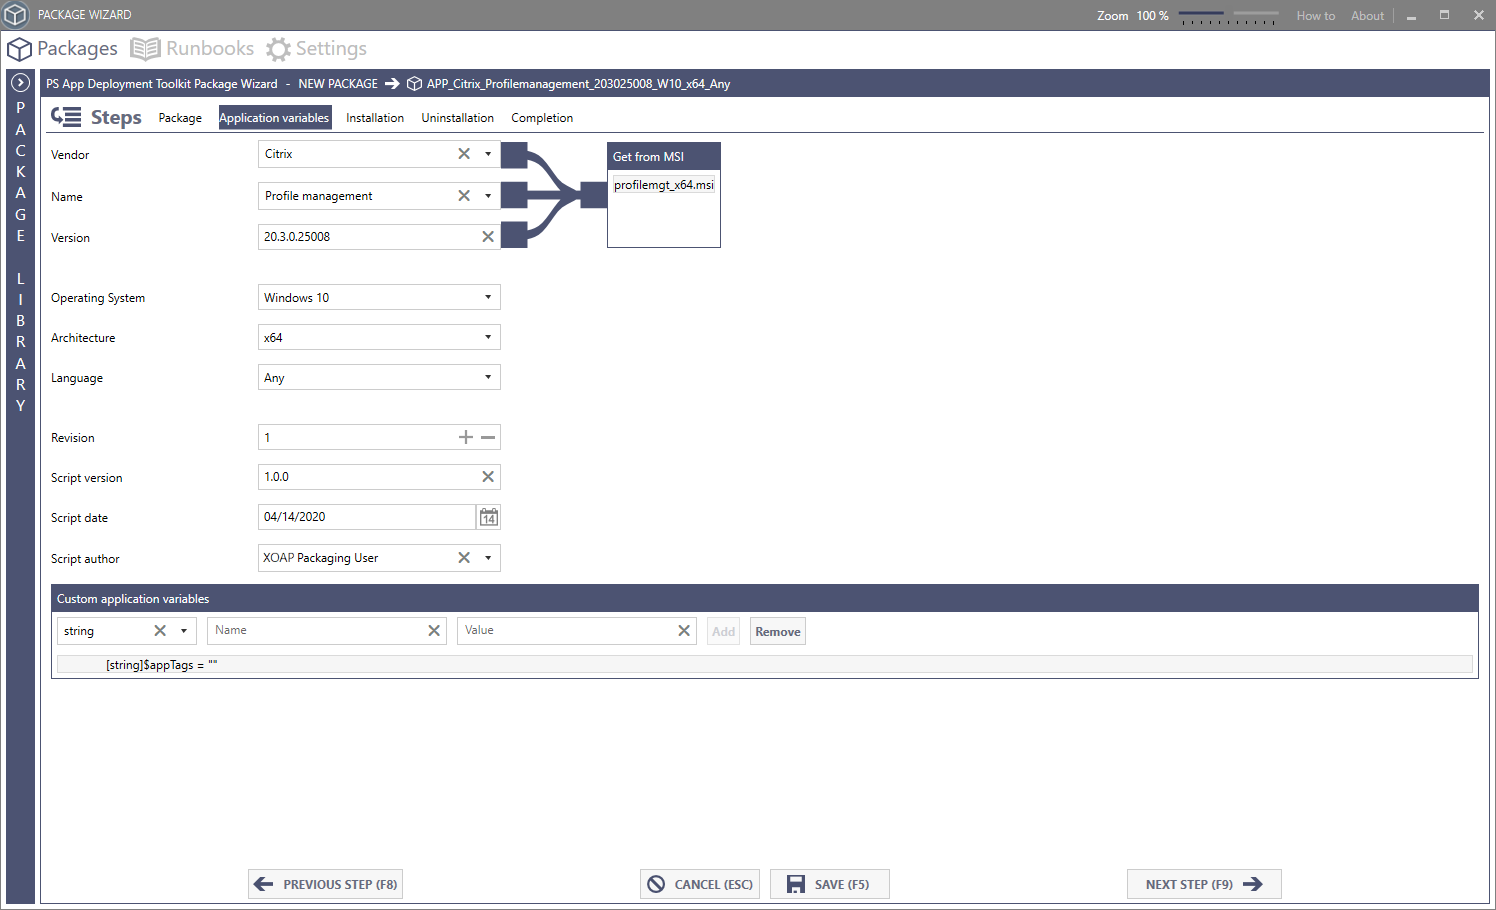
Vendor
If you are using an MSI the vendor, name and version fields are automatically propagated in the fields. The vendor name field should only contain the following characters: a-z, A-Z, 0-9, - and space.
Name
This is the name of the application. If you are using an MSI the name field is automatically propagated.
The vendor and name field is only allowed to contain the following characters: a-z, A-Z, 0-9, - and space
Version
This is the version of the aplication. If you are using an msi the name field is automatically propagated.
The vendor and name field is only allowed to contain the following characters: a-z, A-Z, 0-9, - and space
Operating System
You can choose from the following list:
- Windows 7
- Windows 8
- Windows 8.1
- Windows 10
- Windows Server 2008
- Windows Server 2008 R2
- Windows Server 2012
- Windows Server 2012 R2
- Windows Server 2016
- Windows Server 2019
Architecture
You can choose from the following list:
- x86
- x64
- Any
Language
You can choose from the following list:
- Any
- EN
- DE
- NL
- DA
- ES
- PT
- FR
- IT
- JA
- NB
- SV
Revision
The revision field is used to define the package revision. Every time a package is changed the revision field should be updated by the application packager.
Script Version
This field defines the overall script version of the PSADT application package.
Script Date
This is the date of the script change.
Script Author
This field is used to insert the creator of the PSADT application package. The PSADT Package Wizard takes the currently logged on user from a Windows machine to auto-fill this field.
Custom Application Variables
You are also able to add custom variables to the script that you can use to further parameterize the application package.
The following parameters are available:
- string
- string []
- char
- char []
- bool
- switch
- int
- int []
- decimal
- single
- double
When you are done with adjusting all values click on NEXT STEP or press F9.
Installation
Now you are in the installation area where you will define the following installation phases:
Phase Pre installation
This is the phase where you are able to define the PowerShell commands that should run before the installation.
Phase Installation
This is the phase where the actual installation of the software takes place.
Phase Post installation
In this phase you can define the commands that should run after the installation.
Important Package Wizard areas
The following areas need special attention in this window:
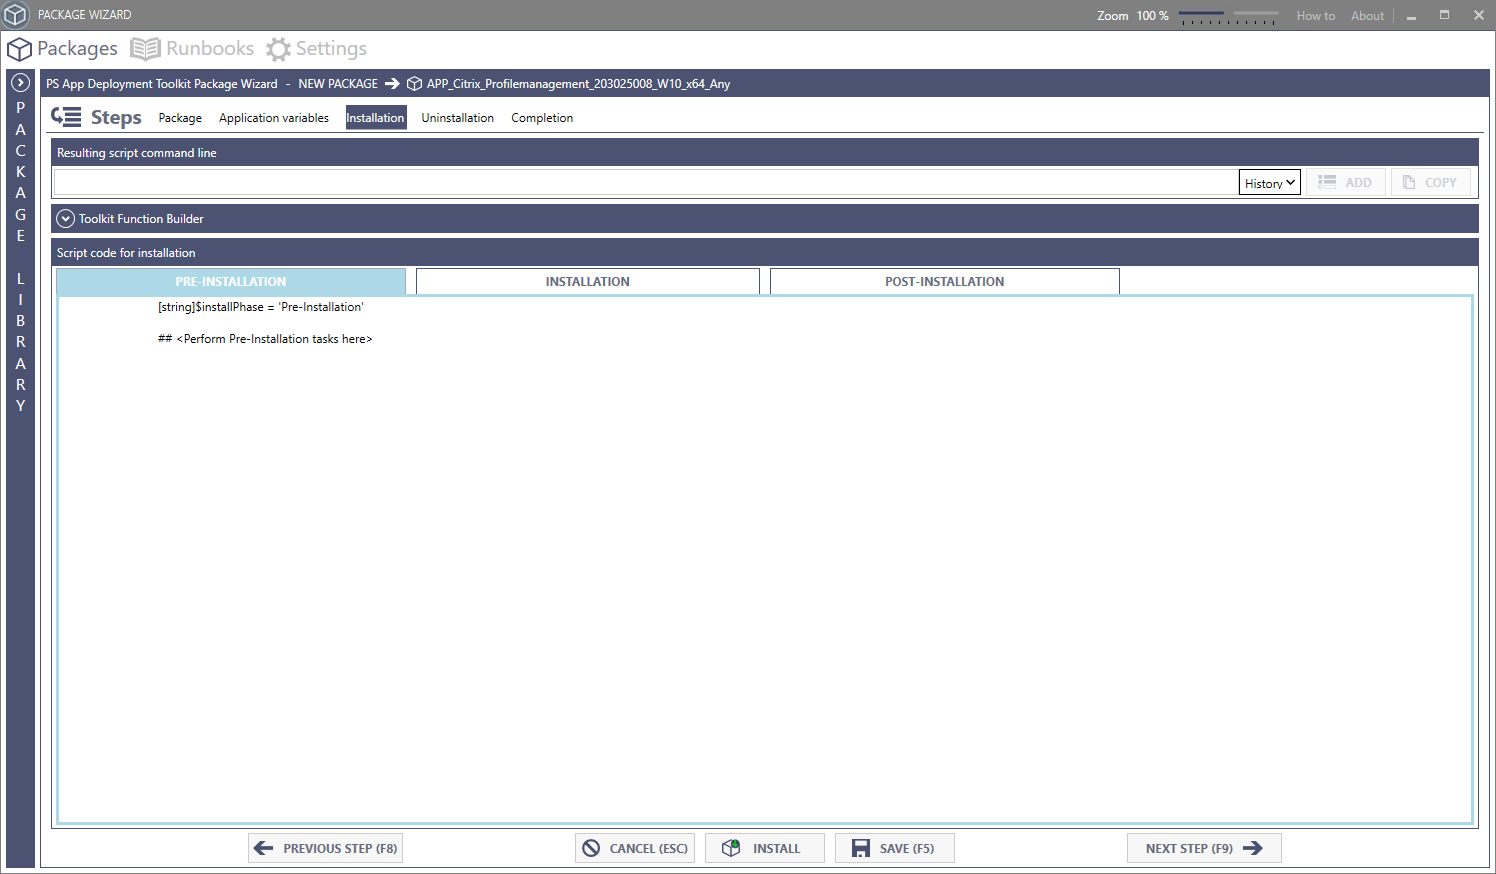
Resulting Script Command Line
This is the commandline that will be inserted into the script area.
Toolkit Function Builder
This is the main area that can be used to insert the necessary script commands.
Script Code for Installation
This is the area with the final script code.
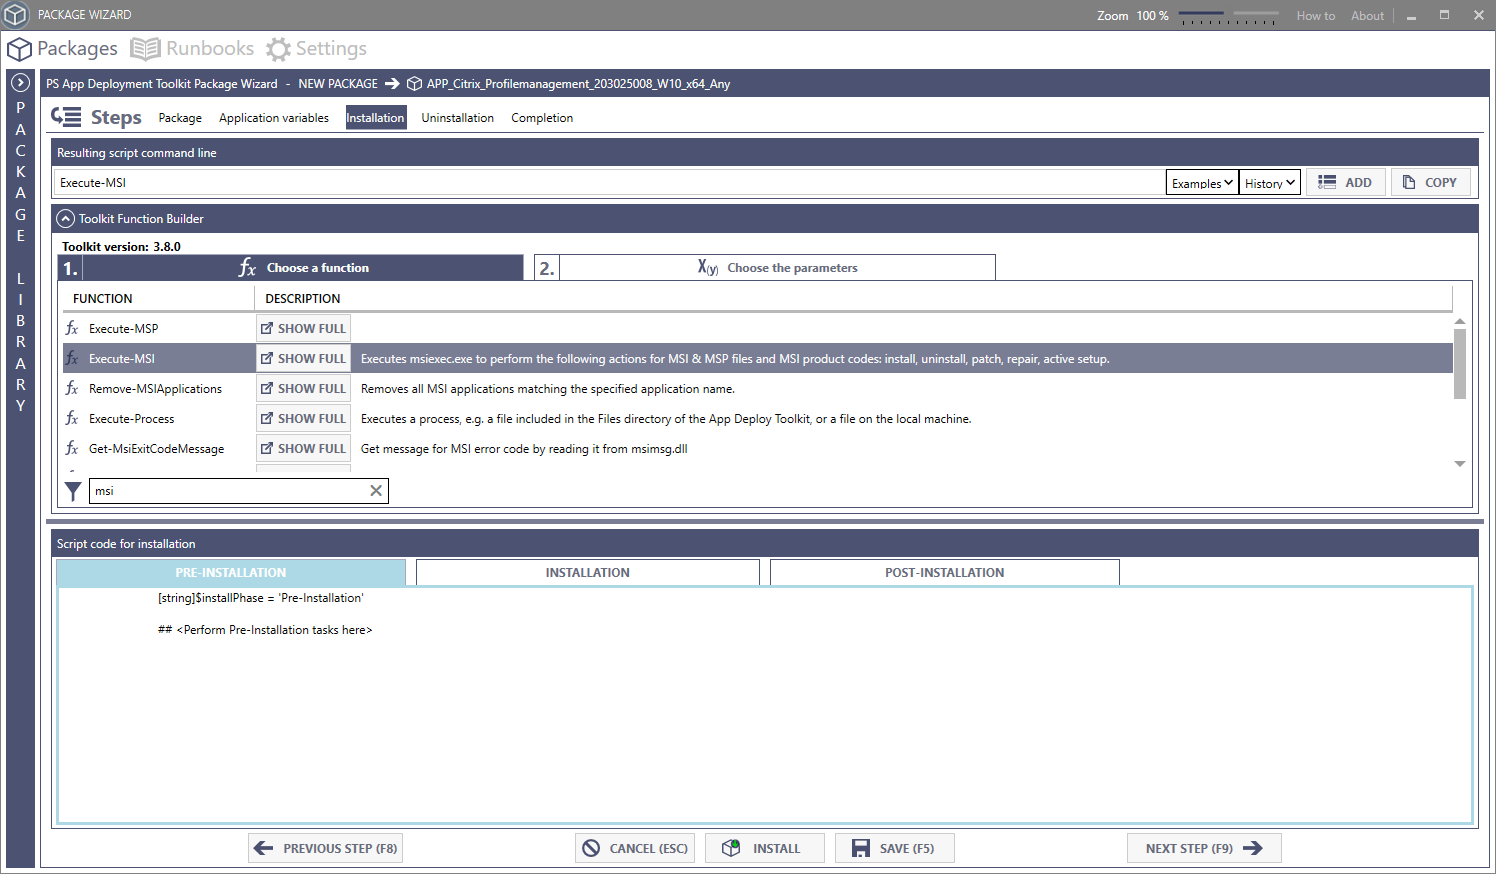
Let’s move on and open the Toolkit Function Builder. You see a search bar in the lower left. This is where you can search for functions that are available in the PSADT framework. In our case we’ll search for"*msi" and the search will return a function named “Execute-MSI”. Click on the function.
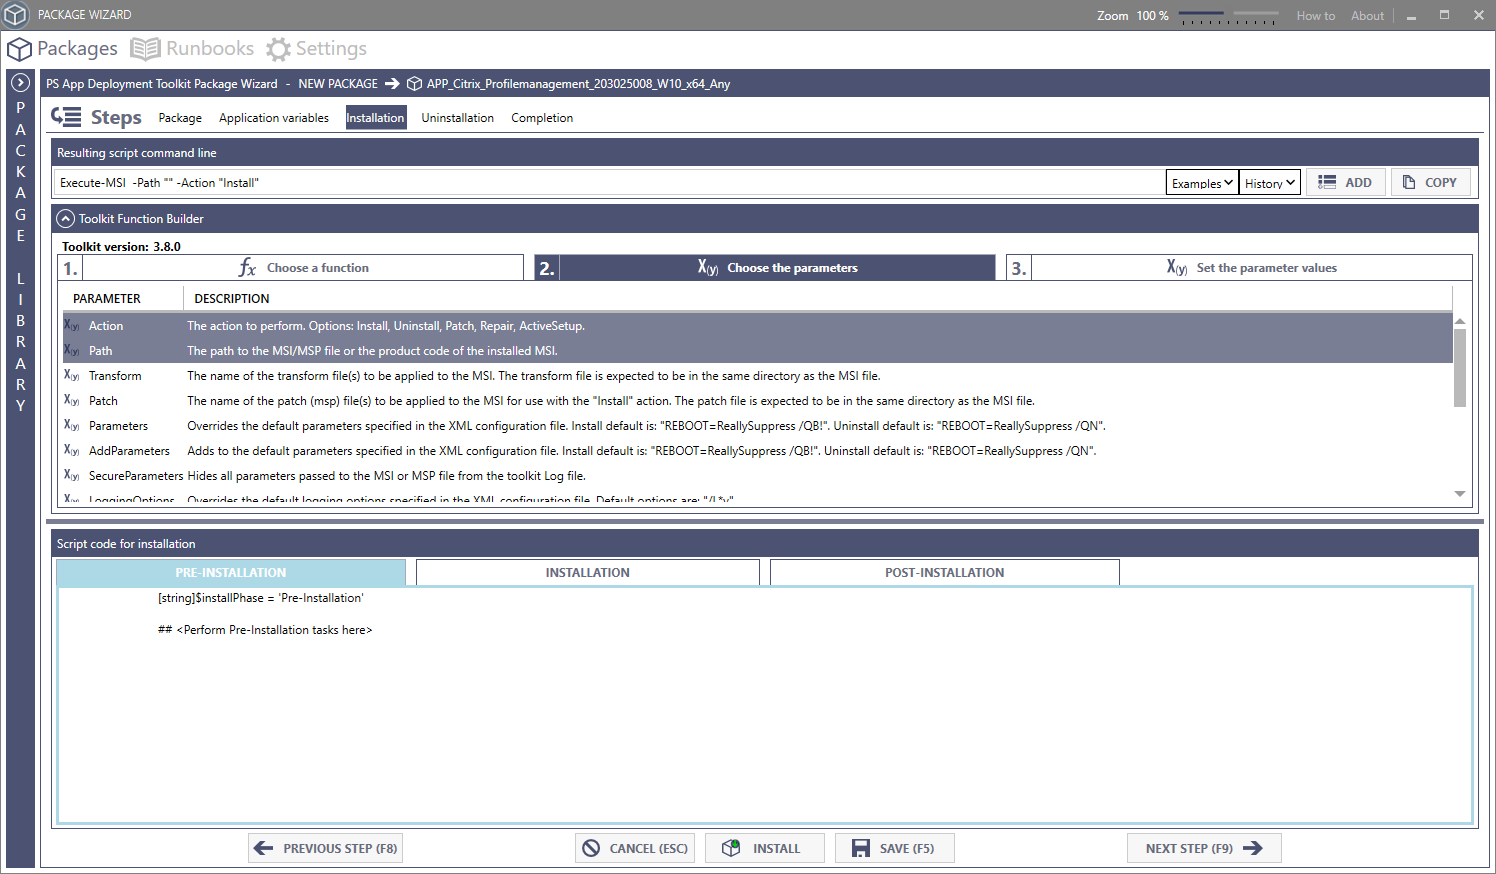
You see that a second window appears in the middle, click on the window to activate it. This window contains all the parameters that are available within the function. Grey rows indicate the required fields, path is therefore required.
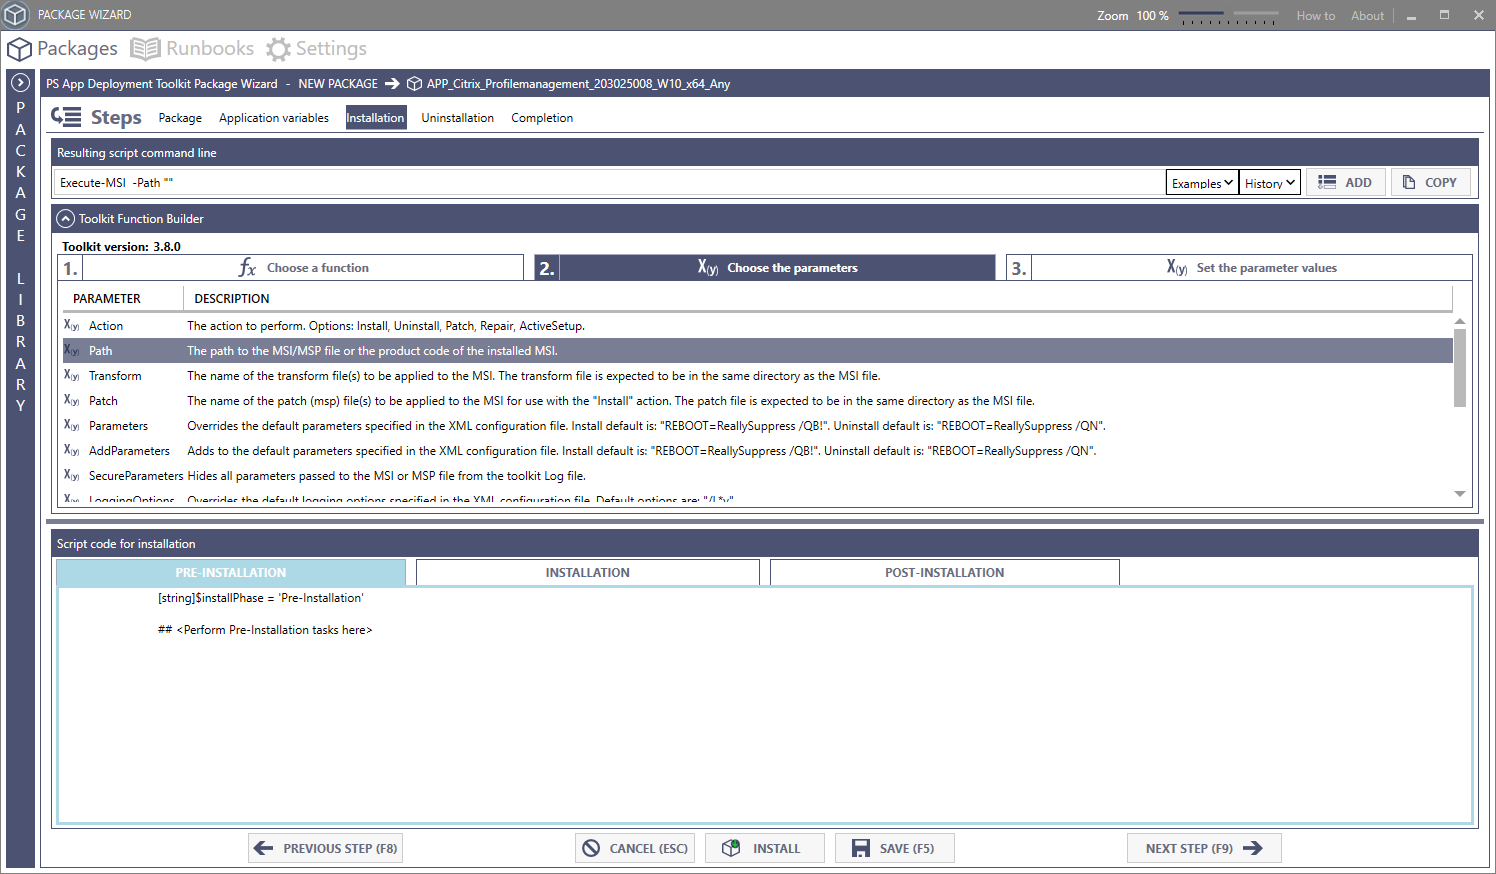
We can choose other parameters by clicking on them. We´ll choose Action as well.
You see that a third window appeared. Let’s click on the third window. This window is used to configure the parameters. Action is a dropdown field that is automatically created out of the options the framework delivers. The Path parameter can be adjusted manually or by using the Value Browser that opens automatically when you select the path field.
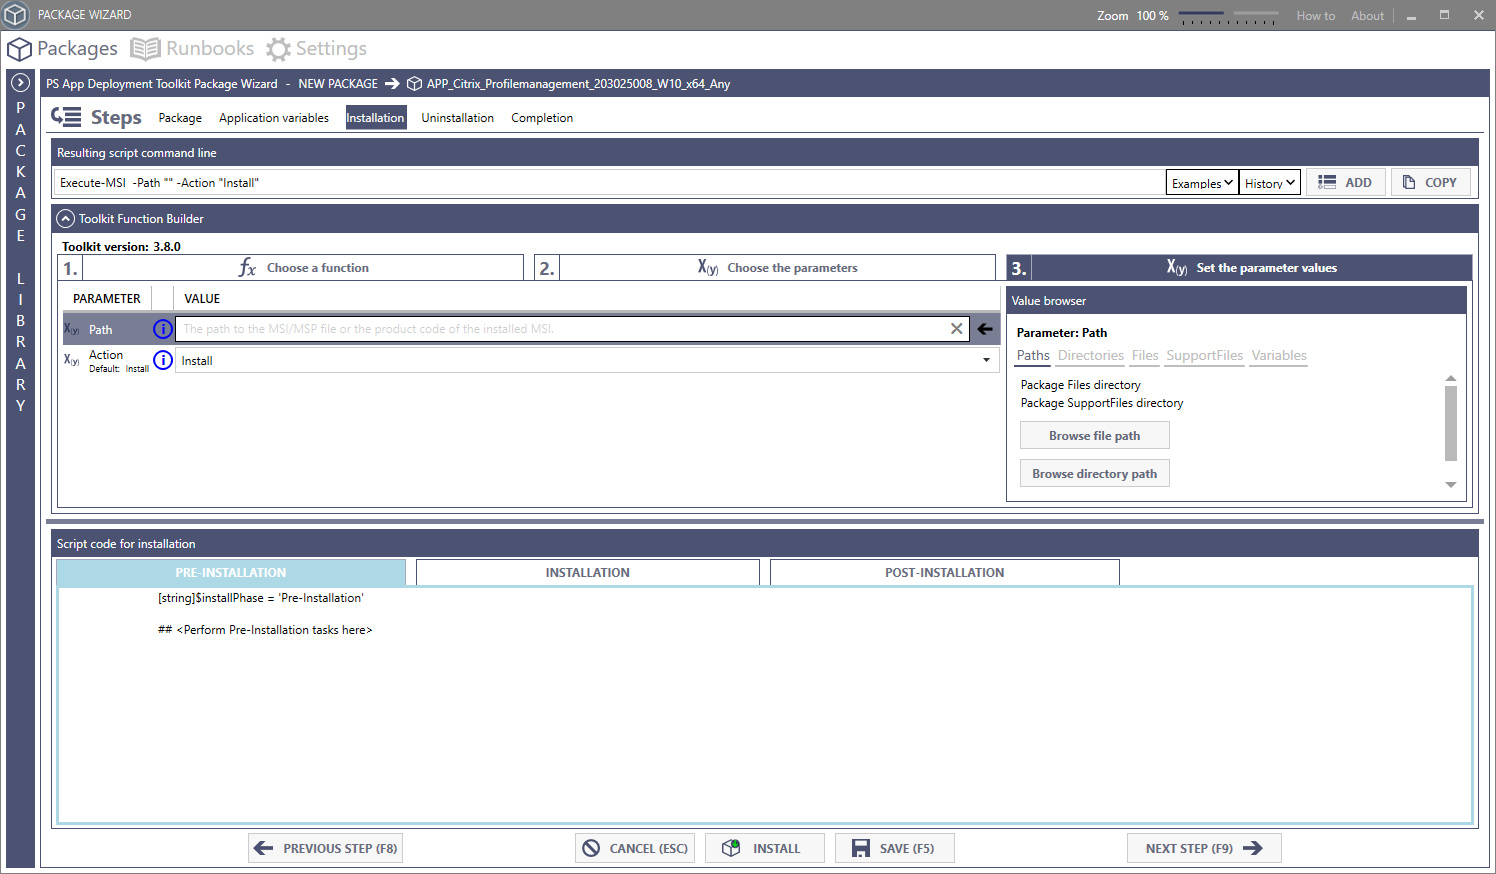
Value Browser
The Value Browser has the following functionality:
-
Paths: You can navigate to paths available on your system.
-
Directories: These are the directories you integrated in the first packaging step where you integrated the MSI file.
-
Files: This is the “Files” folder within the PSADT framework.
-
SupportFiles: This is the “SupportFiles” folder within the PSADT framework.
-
Variables: Here you can find all environment variables available on your system.
Click on Files to add the MSI we integrated in the first step. The path to the file is automatically inserted with the variable for the directory. Choose Install as action.

Now choose the INSTALLATION area in the lower window and place your cursor at the location you want to insert the command. We should place the cursor somewhere below the following are:
## <Perform Installation tasks here>
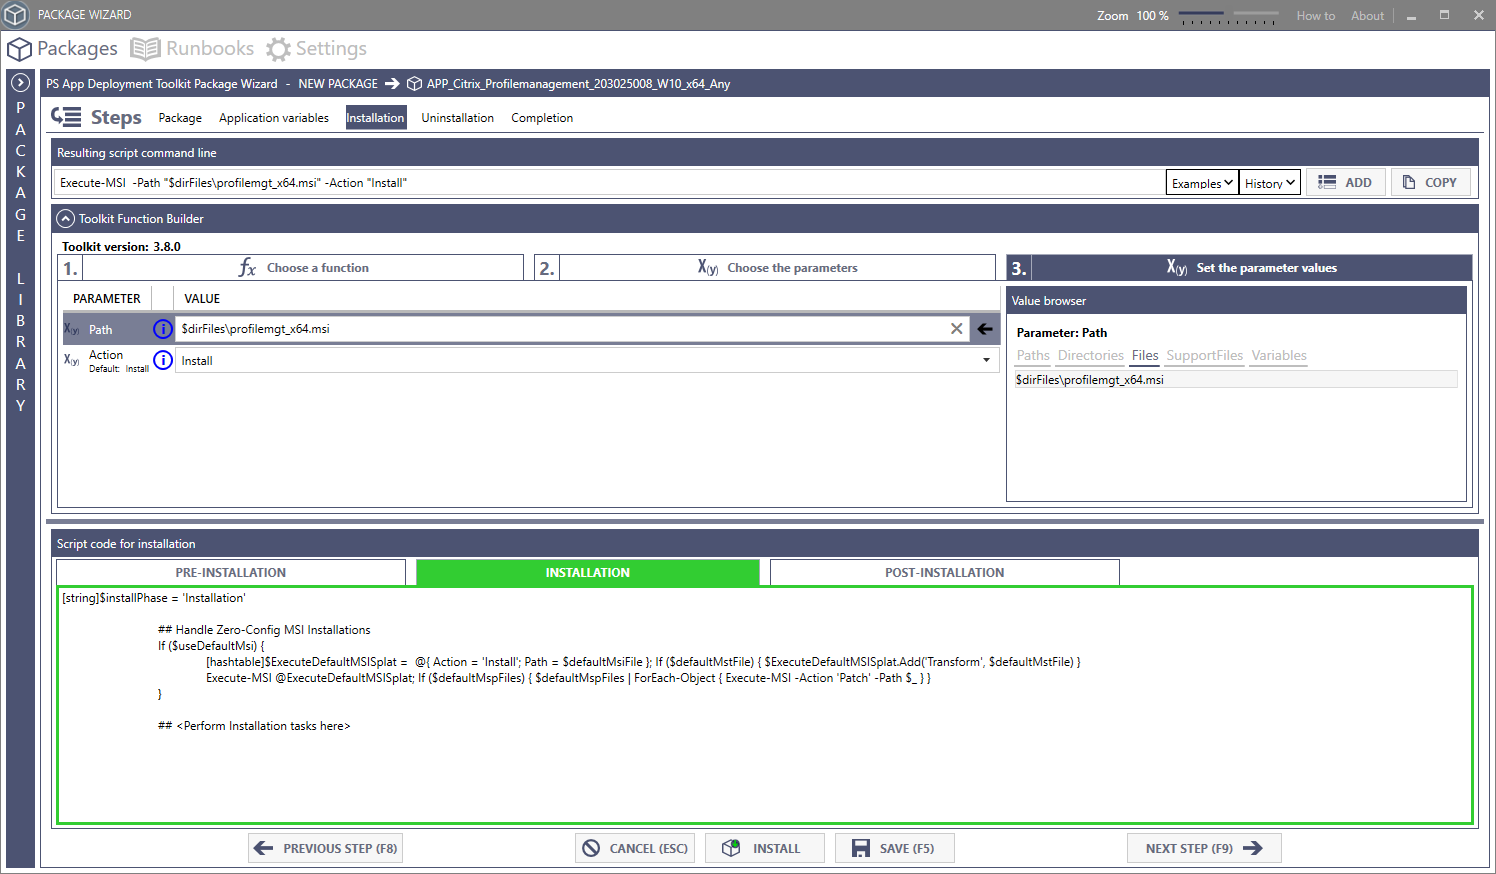
Have a look at the Resulting Script Commandline area above the Toolkit Function Builder. You see the following command:
Execute-MSI -Path "$dirFiles\profilemgt_x64.msi" -Action "Install"
Click on the ADD button on the right side to insert the command in the INSTALLATION area.

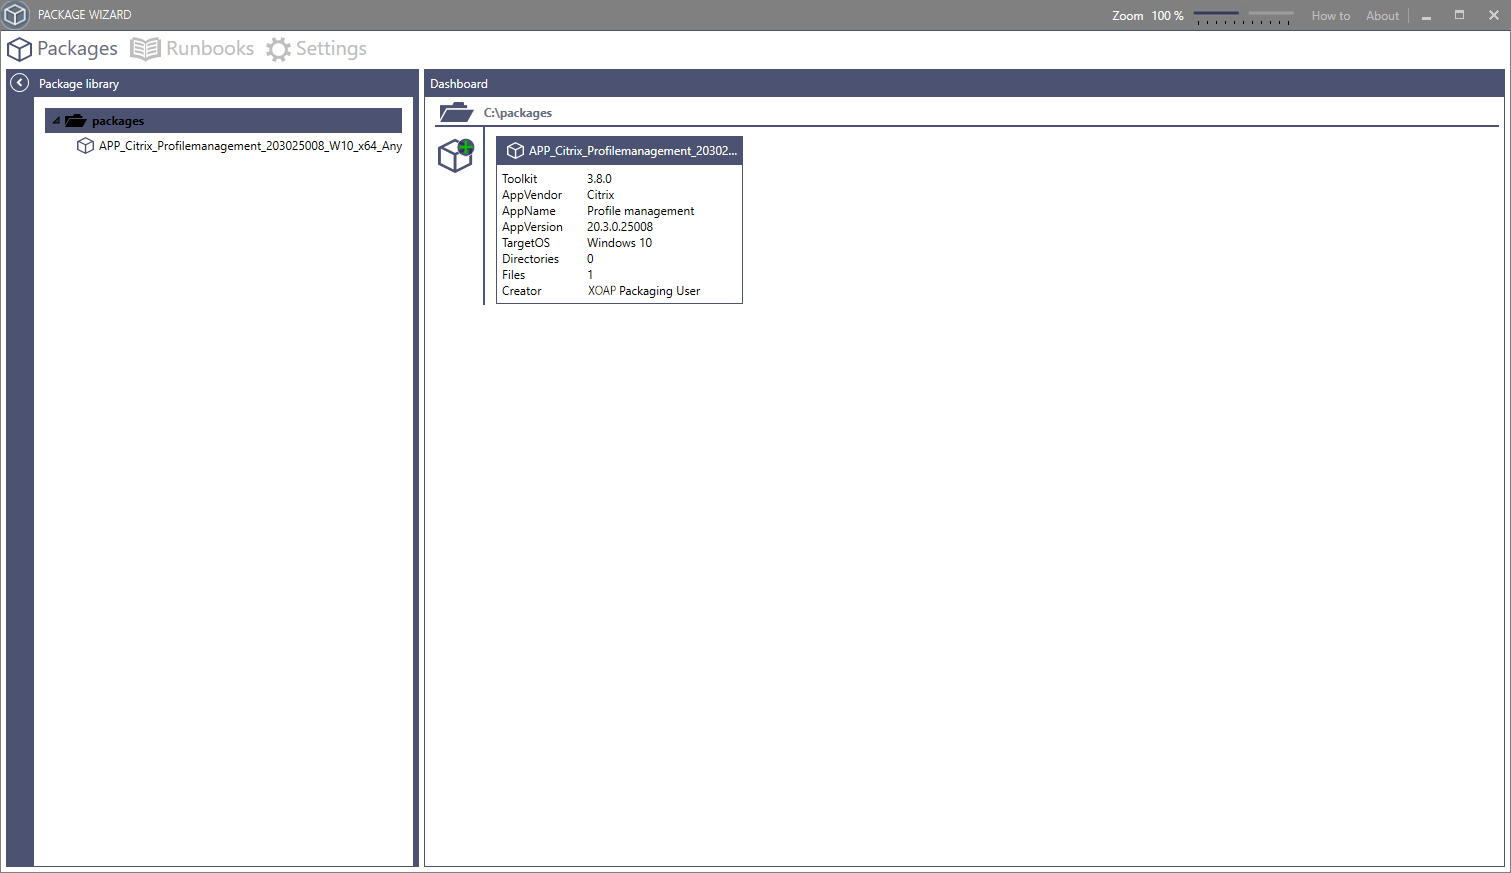
You can now save this package. The packaging process will be closed and you will be brought back to the Dashboard view where you can find your package. You can click on the package to edit it again. Switch to the INSTALLATION area again.

Click on INSTALL. The installation of the package will start on your local machine. After the installation finishes you will see a fourth window in the script code for INSTALLATION with the RESULT. Here you will find the installation log that is also written to C:\Windows\Logs\Software. You can change the log file location in the framework settings. To change the location switch to the Settings area in the Package Wizard.
Remember that this change is made for all consecutive packages you create later from within the Package Wizard.
If you change the location of the log files the frontend won´t be able to show the lofiles anymore. So be sure you have very good reasons to change the standard setting.

We now have a working installation of the package. Now let´s move on to the UNINSTALLATION area by choosing NEXT STEP or by hitting F9.
Uninstallation
This area works exactly like the INSTALLATION area. The only difference are the UNINSTALLATION areas that are available:
Phase Pre Uninstallation
This is the phase where you are able to define the PowerShell commands that should run before the UNINSTALLATION.
Phase Uninstallation
This is the phase where the actual UNINSTALLATION of the software takes place.
Phase Post Uninstallation
In this phase you can define the commands that should be run after the UNINSTALLATION.
Let´s use the exact same process to configure the UNINSTALLATION. First use the Toolkit function builder to search for “MSI”.

Chose the function Execute-msi and select the second window to choose the parameters.

Switch to the third window and configure the Action parameter and fill in the patch to the installation file with the help of the value browser.
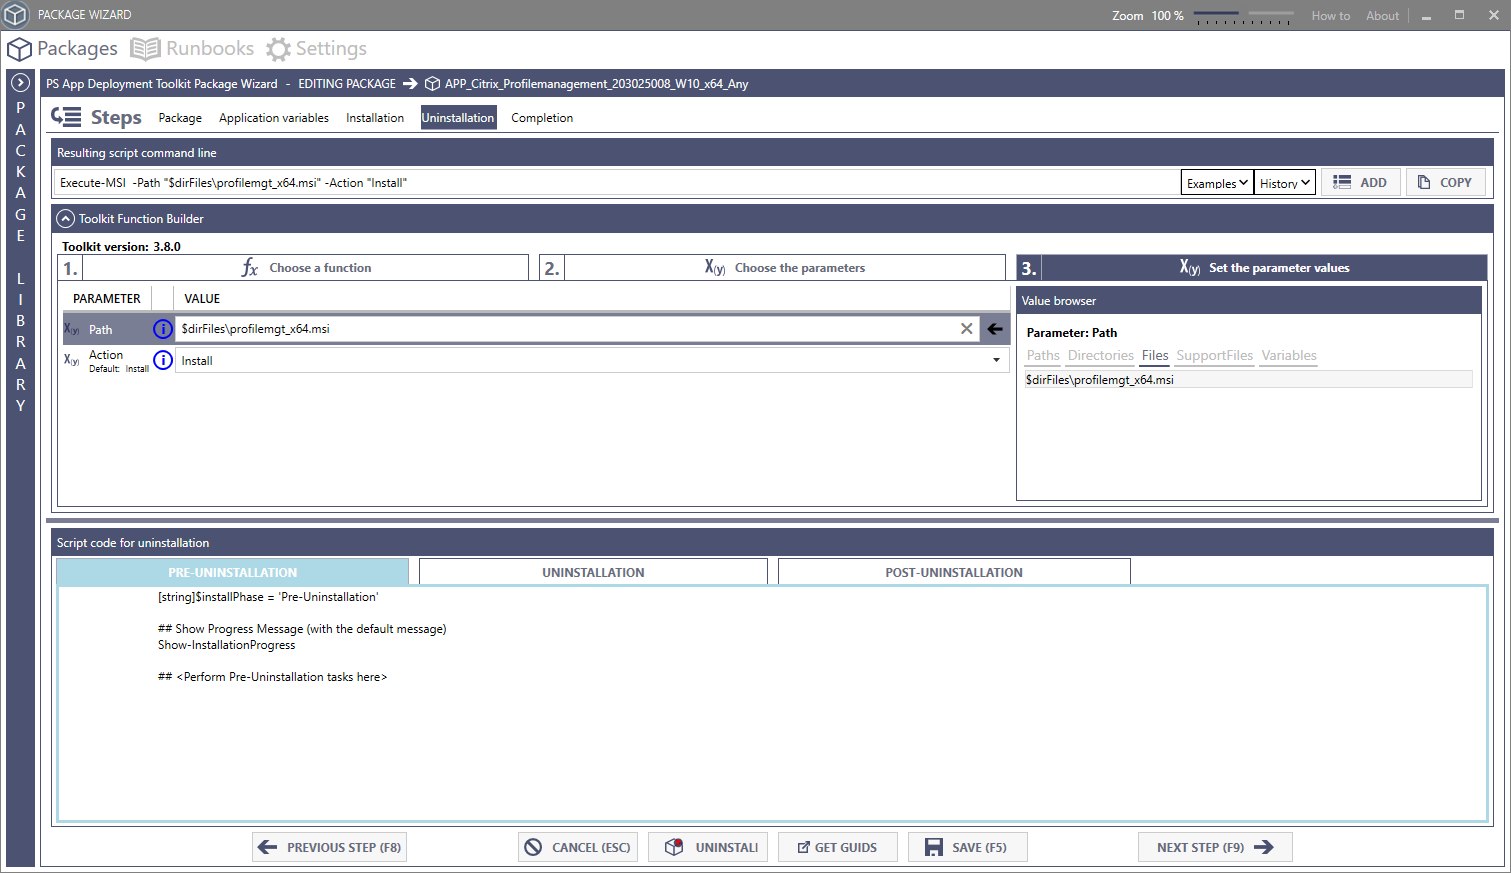
Choose the UNINSTALLATION window and place the cursor at the location you want to insert the command. Add the command by clicking on the ADD button.

Now you are ready to save the package or to start the UNINSTALLATION process on your local machine. Proceed with the UNINSTALL button to uninstall the package. Again the log file from the installation is shown in a fourth window. If everything was successfully executed you can save the package. Click the SAVE button or hit F5.

We are now back in the Dashboard view.
Completion Area
The Completion area shows you a summary of the integrated files and script blocks. It also shows you the resulting deployment script code.
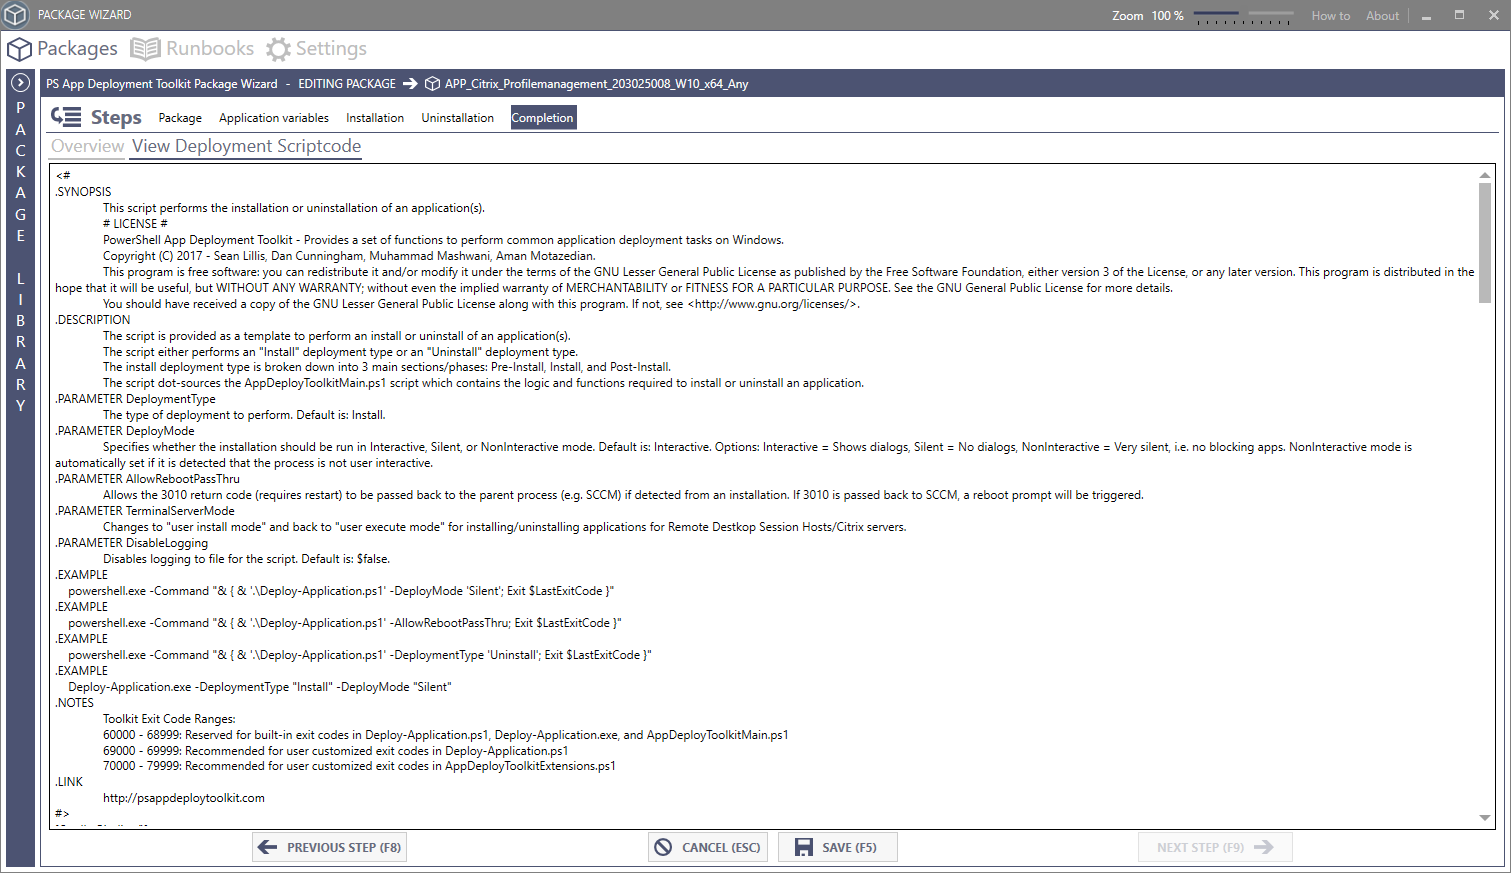
That’s it. You can now proceed uploading the package to XOAP.