This simple to use Wizard helps to configure and create your images.
Start Image Wizard
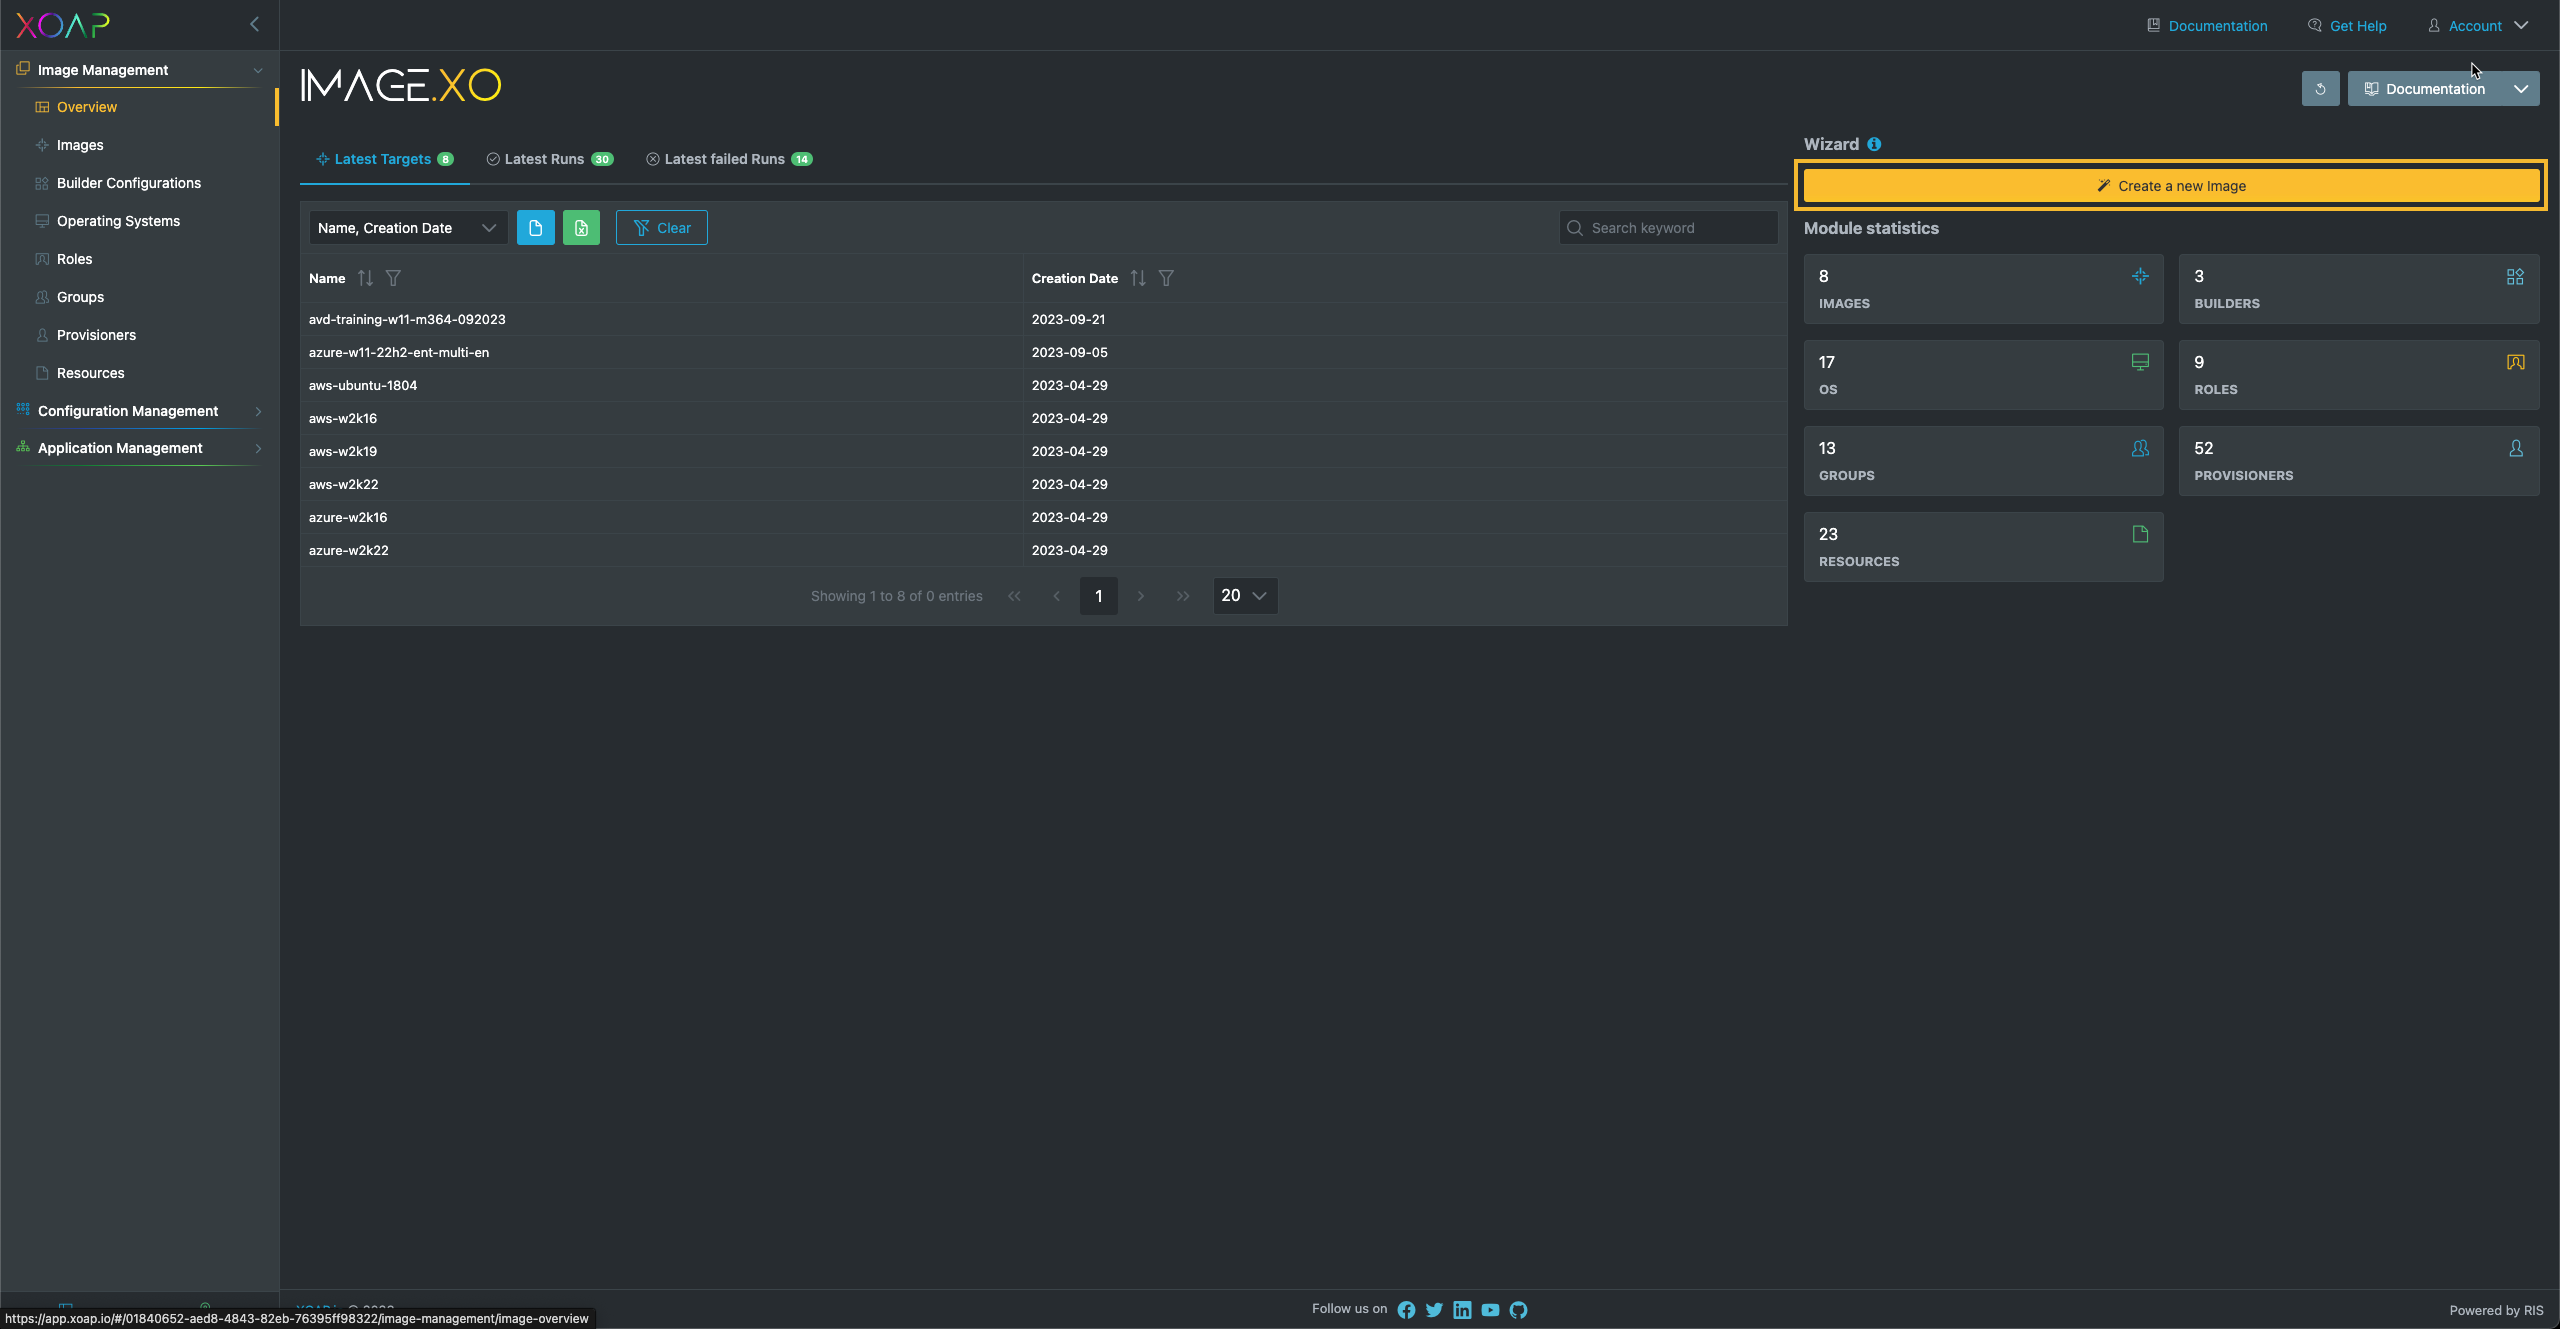
Start by creating a new image in the Image Management overview.
You can skip and jump between the steps if you already uploaded everything that you need in a previous step. Just proceed by clicking on the step you want to work on or the back button.
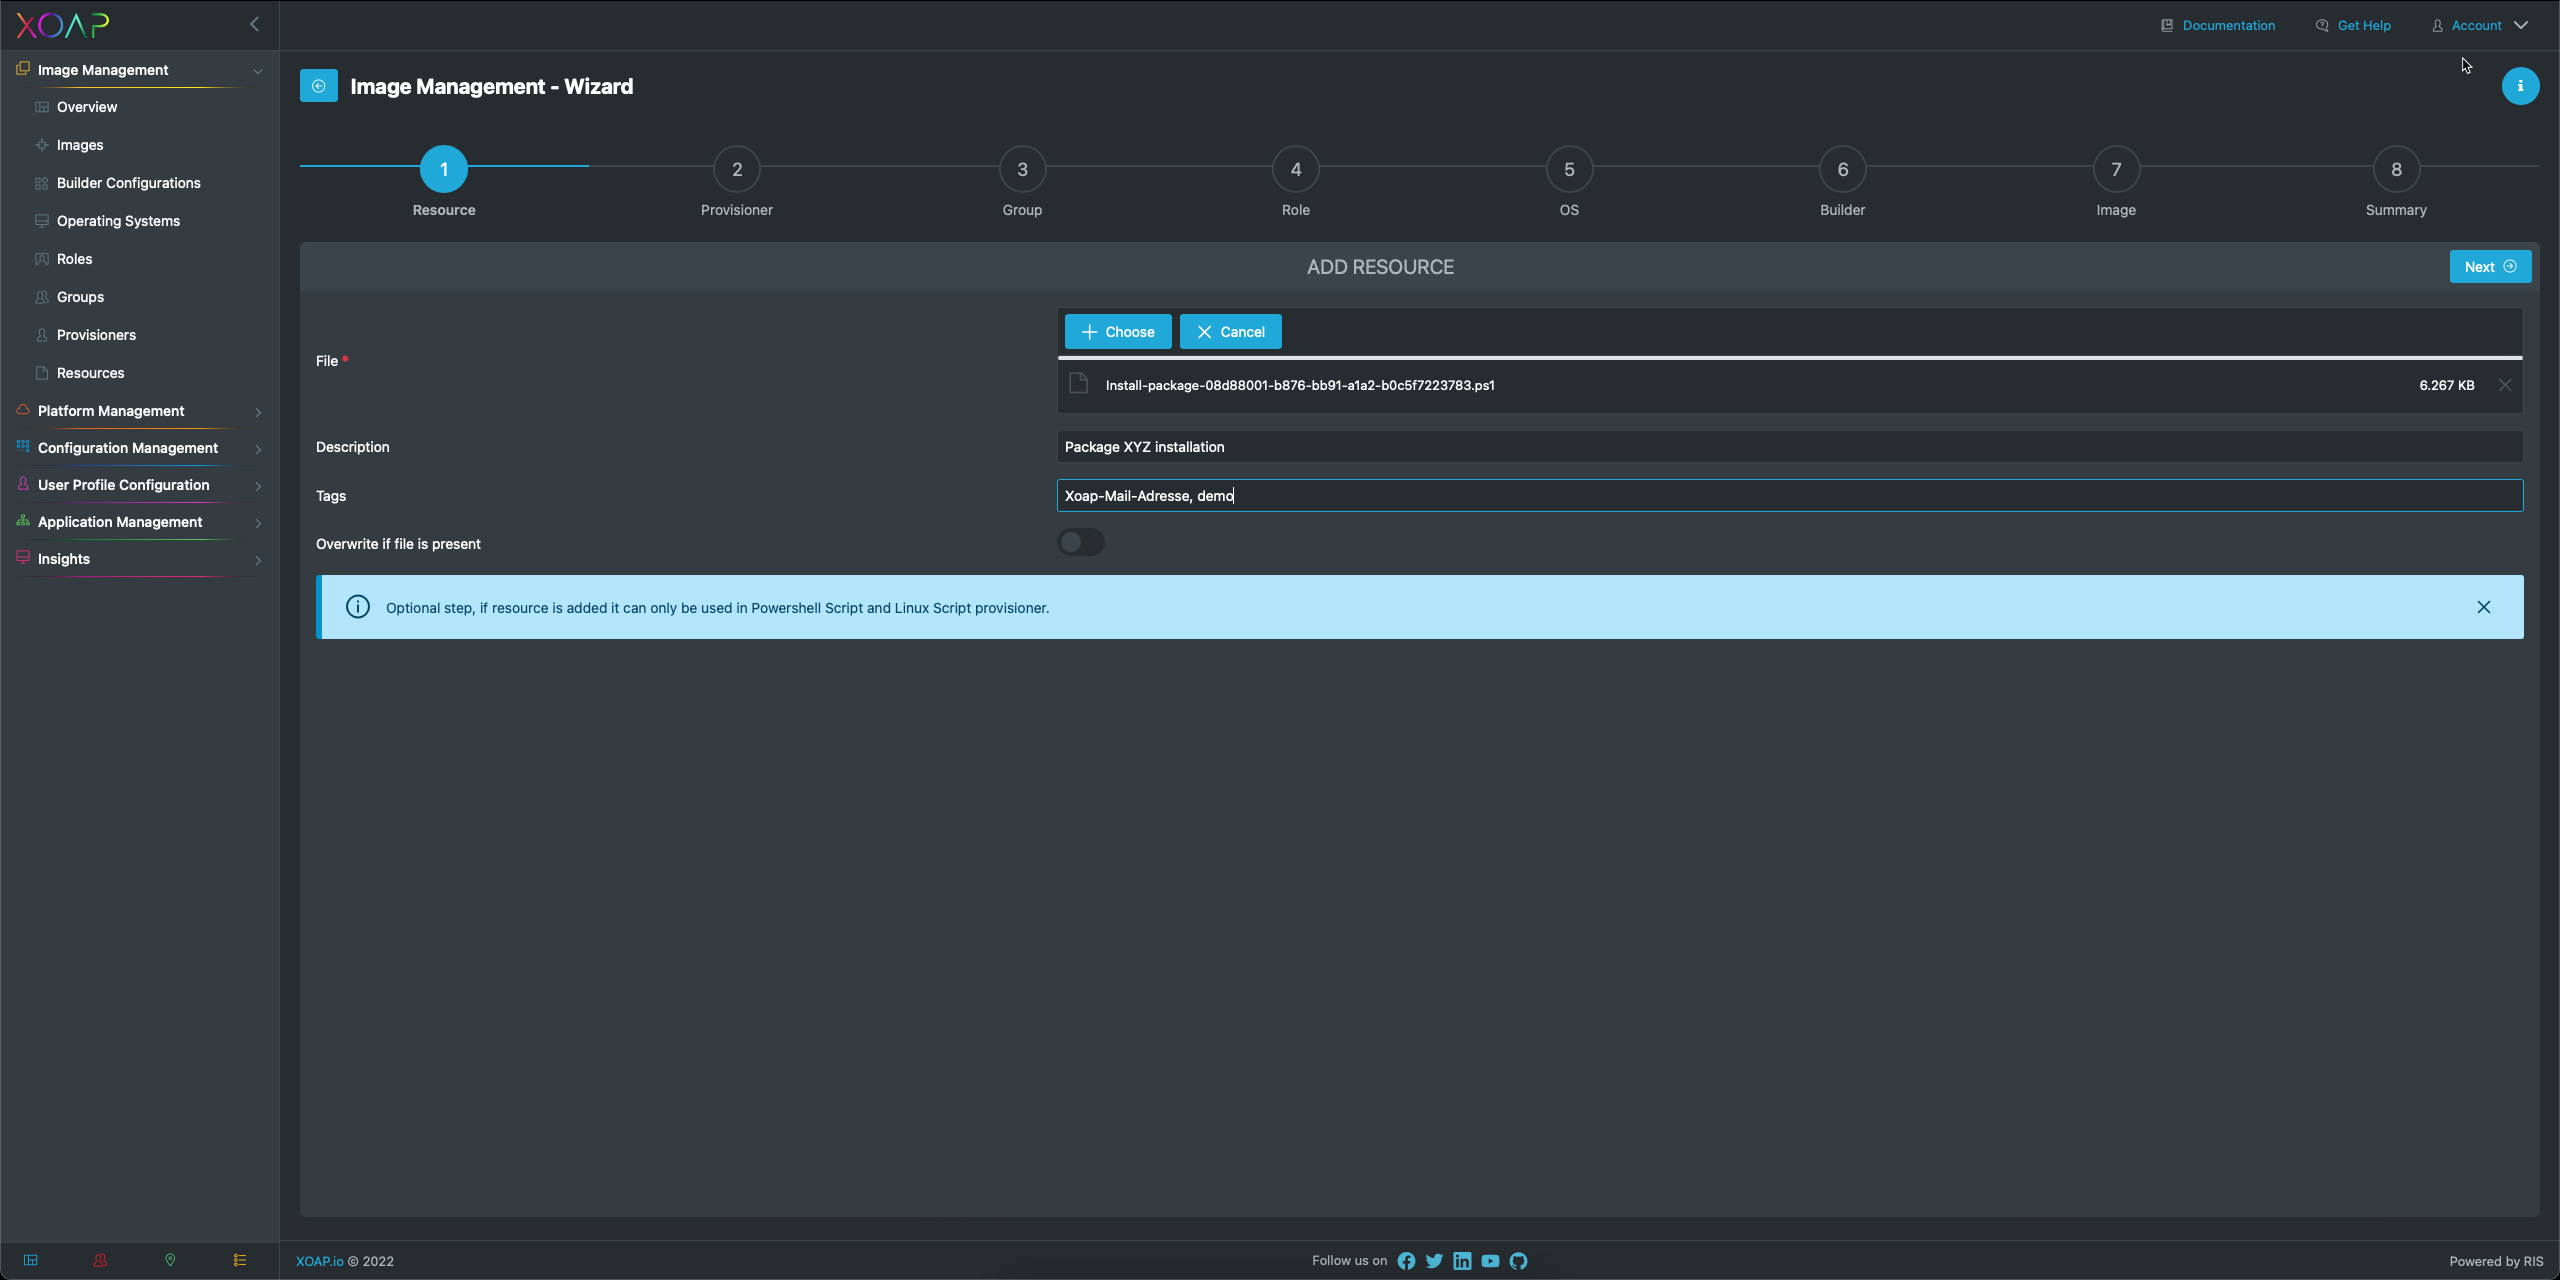
Step 1: Resources
In the first step you can add scripts or files that you need to fully configure your image.
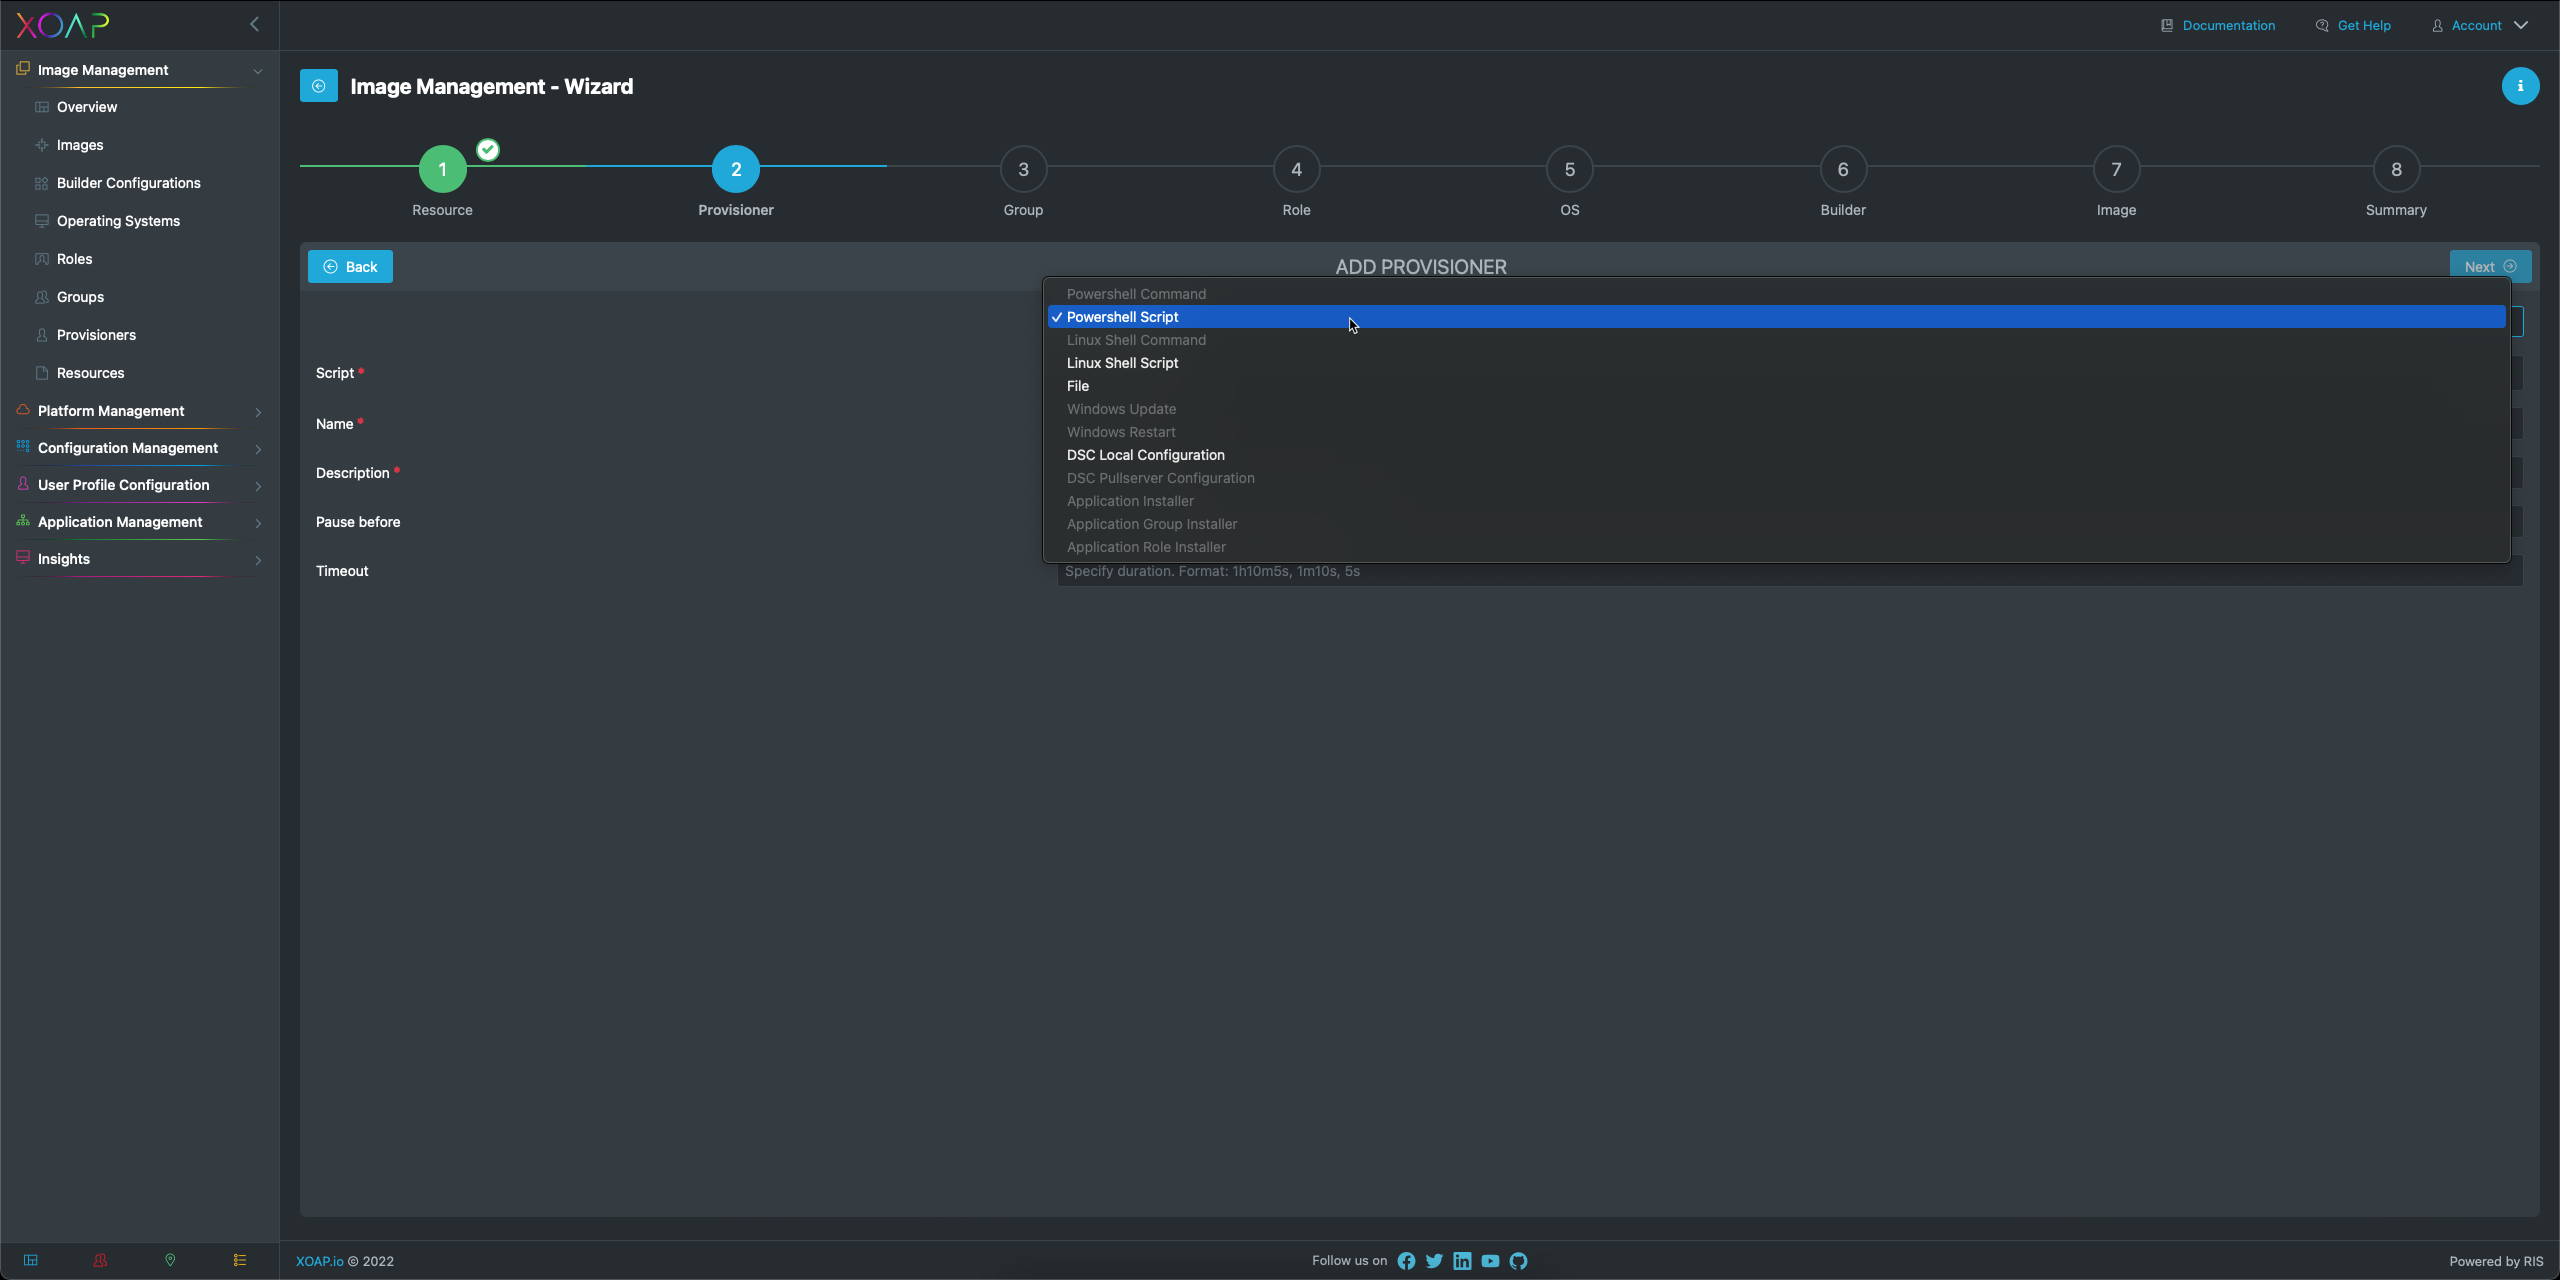
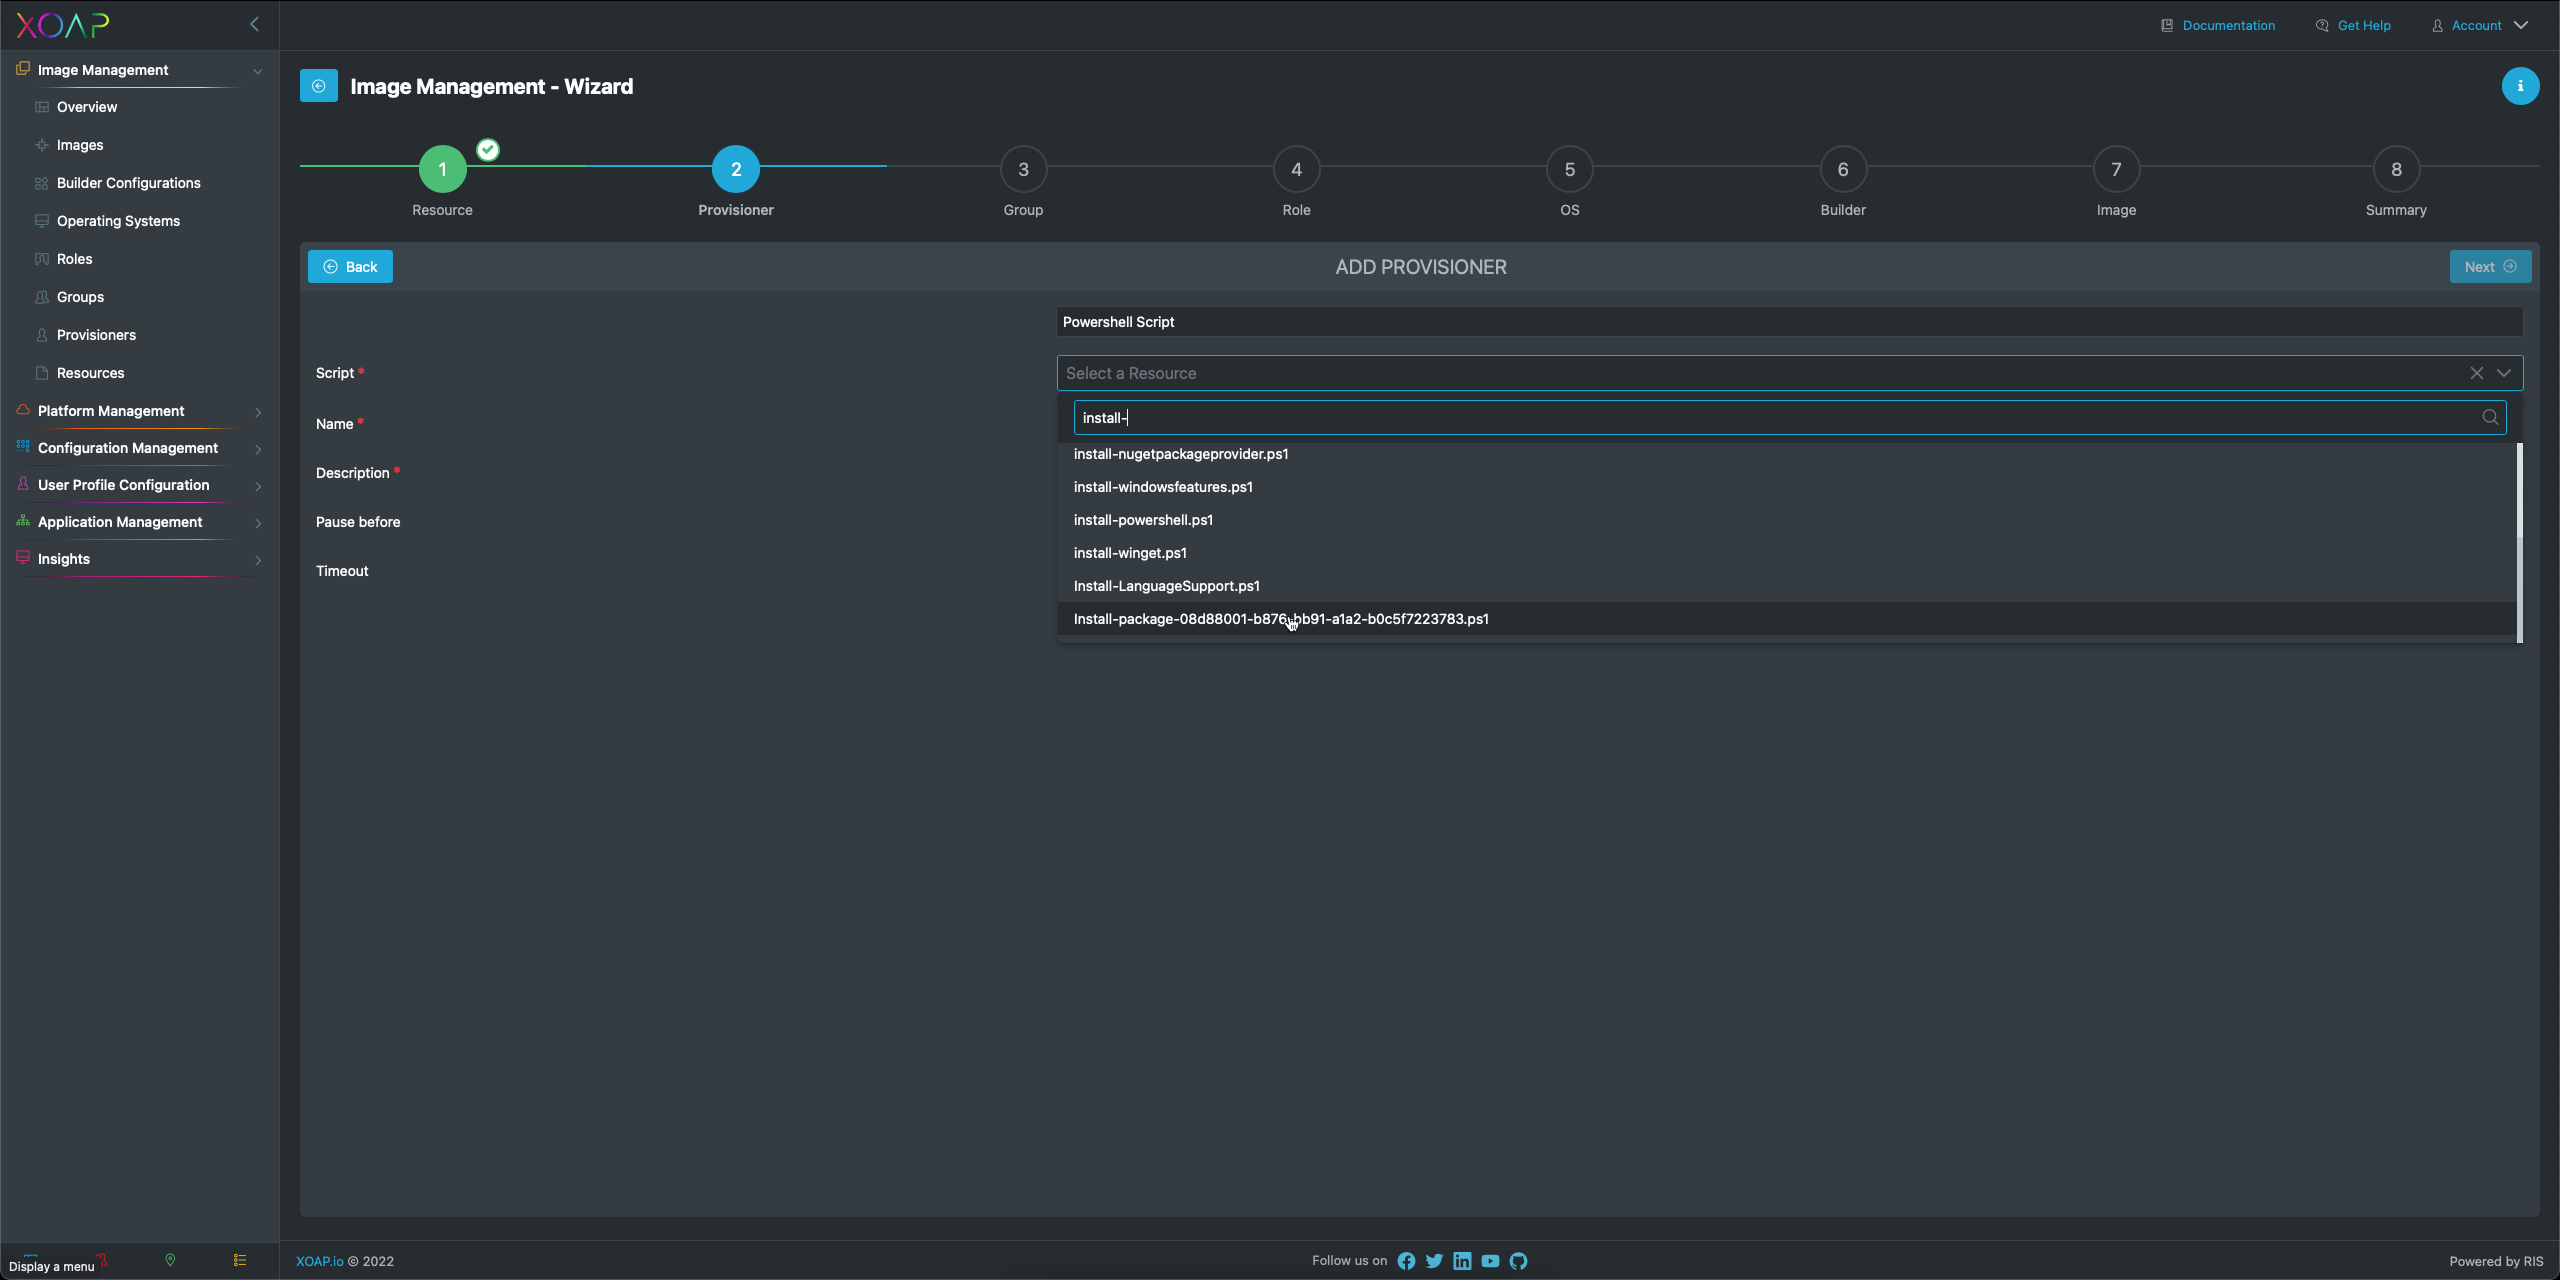
Step 2: Provisioner
In this step you can configure every provisioner you might need during image creation.
Here you can choose from the available provisioners:
- PowerShell Command
- PowerShell Script
- Linux Shell Command
- Linux Shell Script
- File
- Windows Update
- Windows Restart
- DSC Local Configuration
- DSC Pullserver Configuration
- Application Installer
- Application Group Installer
- Application Role Installer
The Wizard will automatically show you the provisioners that match the file type.
You can search through the available files.
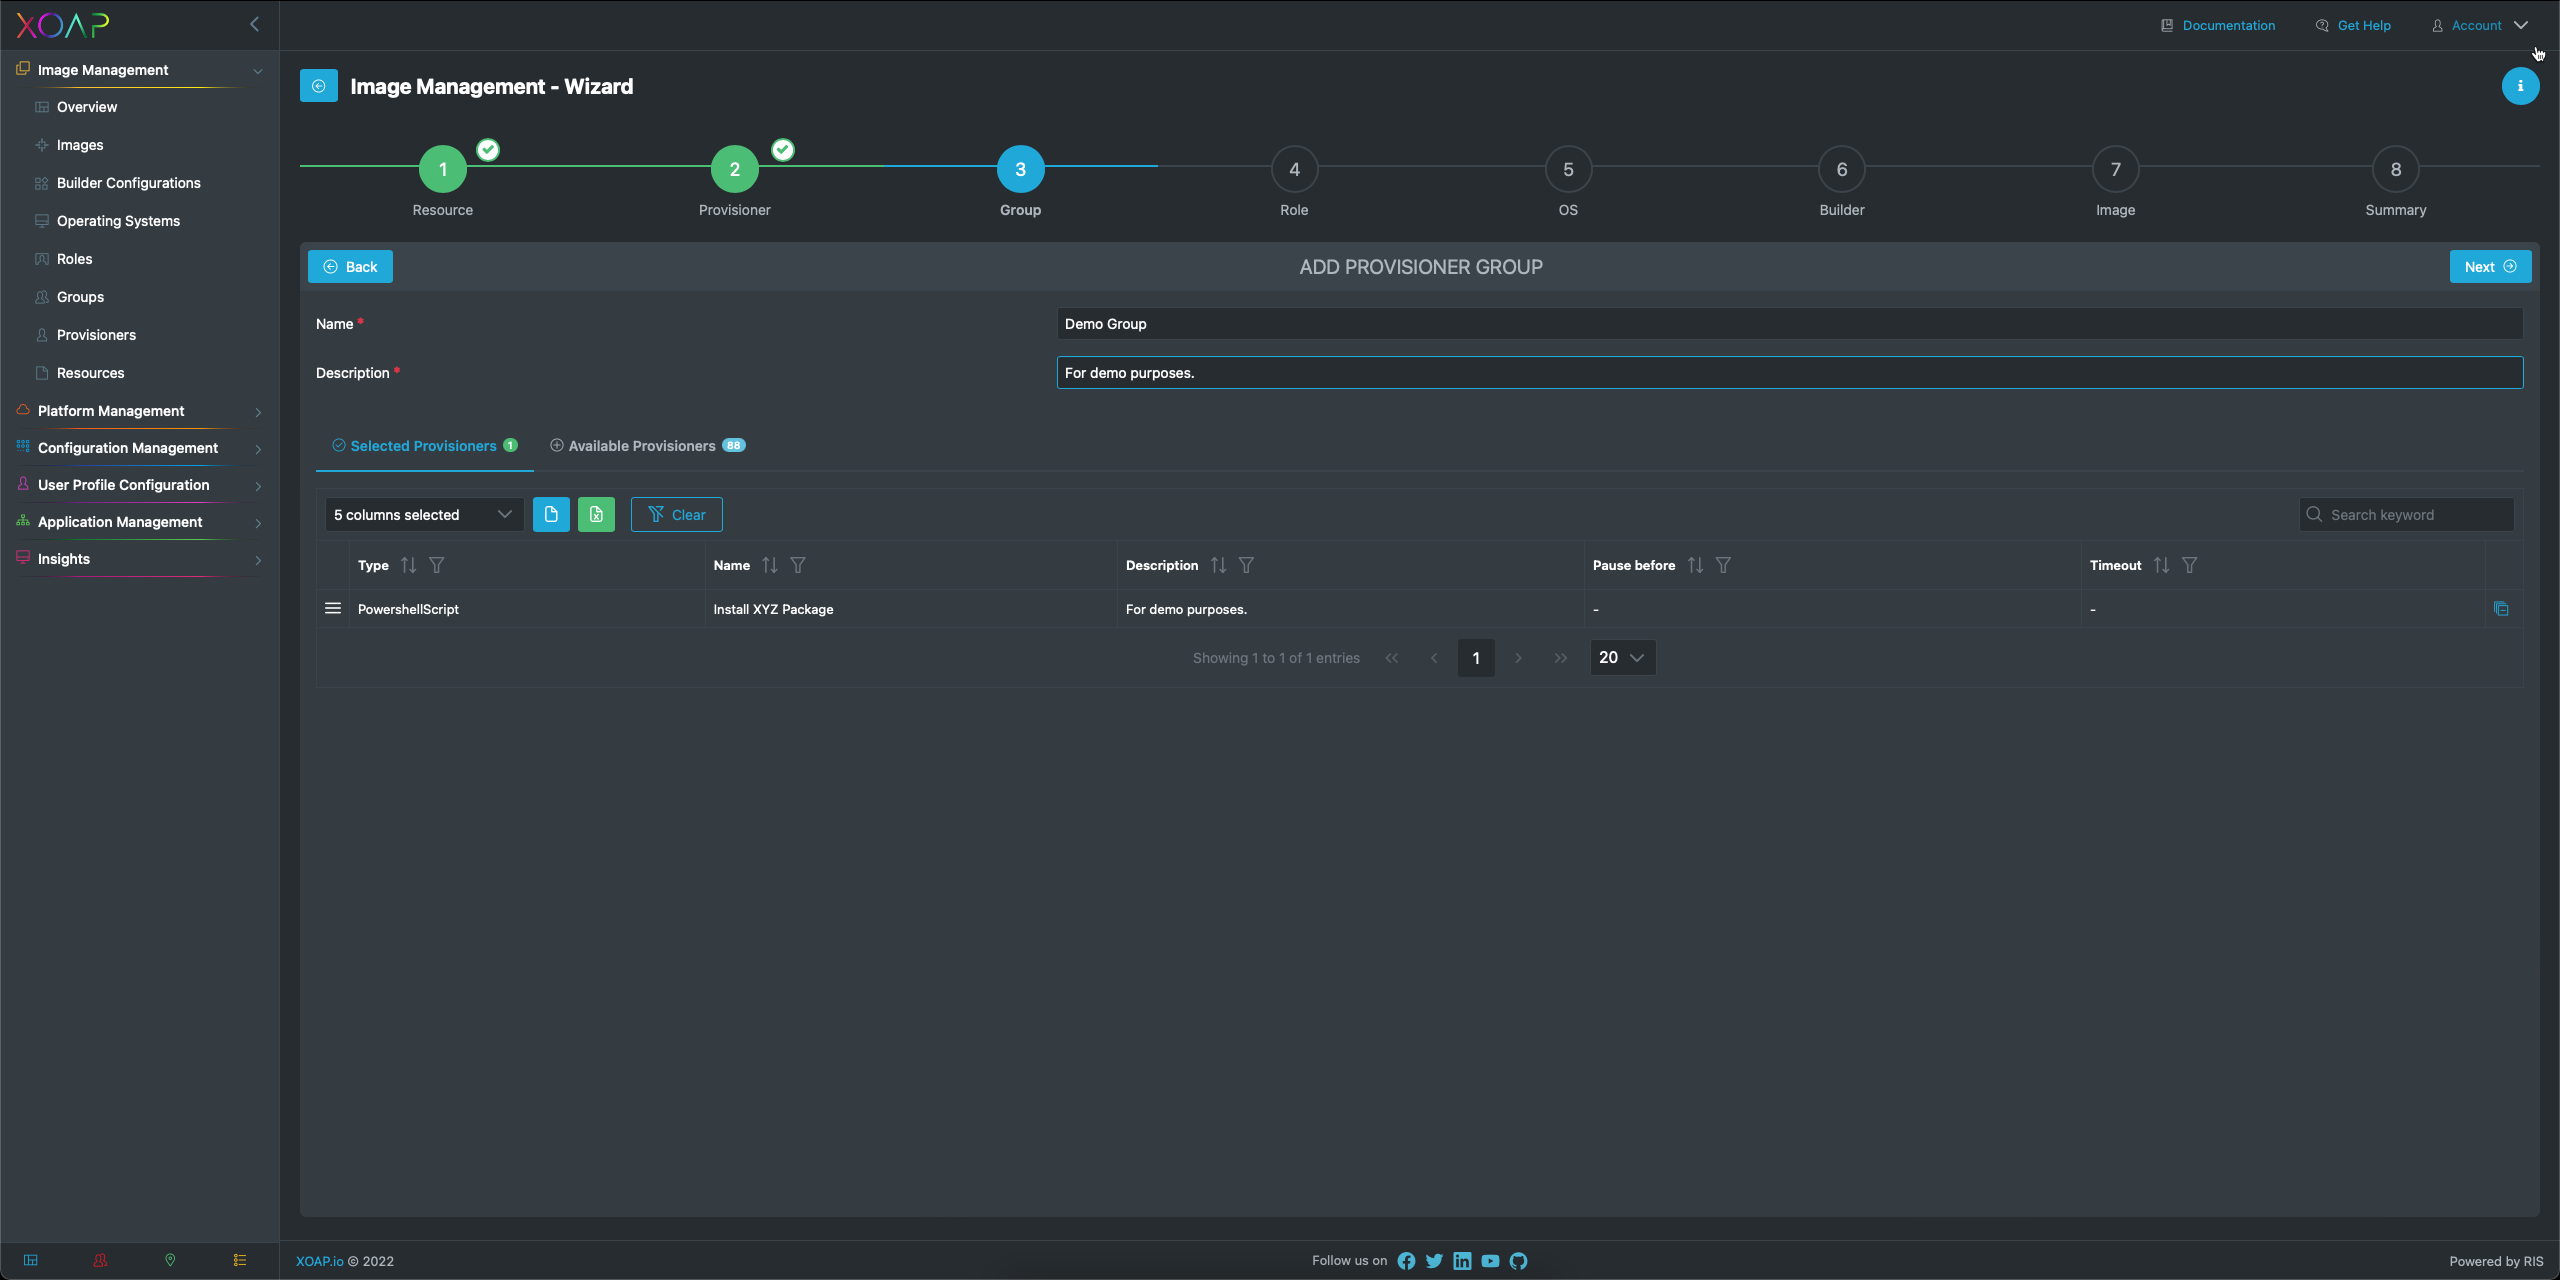
Step 3: Group
Now configure the provisioner groups, which give you the opportunity to create reusable groups for multiple use cases.
Name the group and add all the provisioners you want to include in that group. Add more provisioners if needed and adjust the order of them by dragging the items to the correct position.
To save the changes click next or click on Step 4 to proceed.
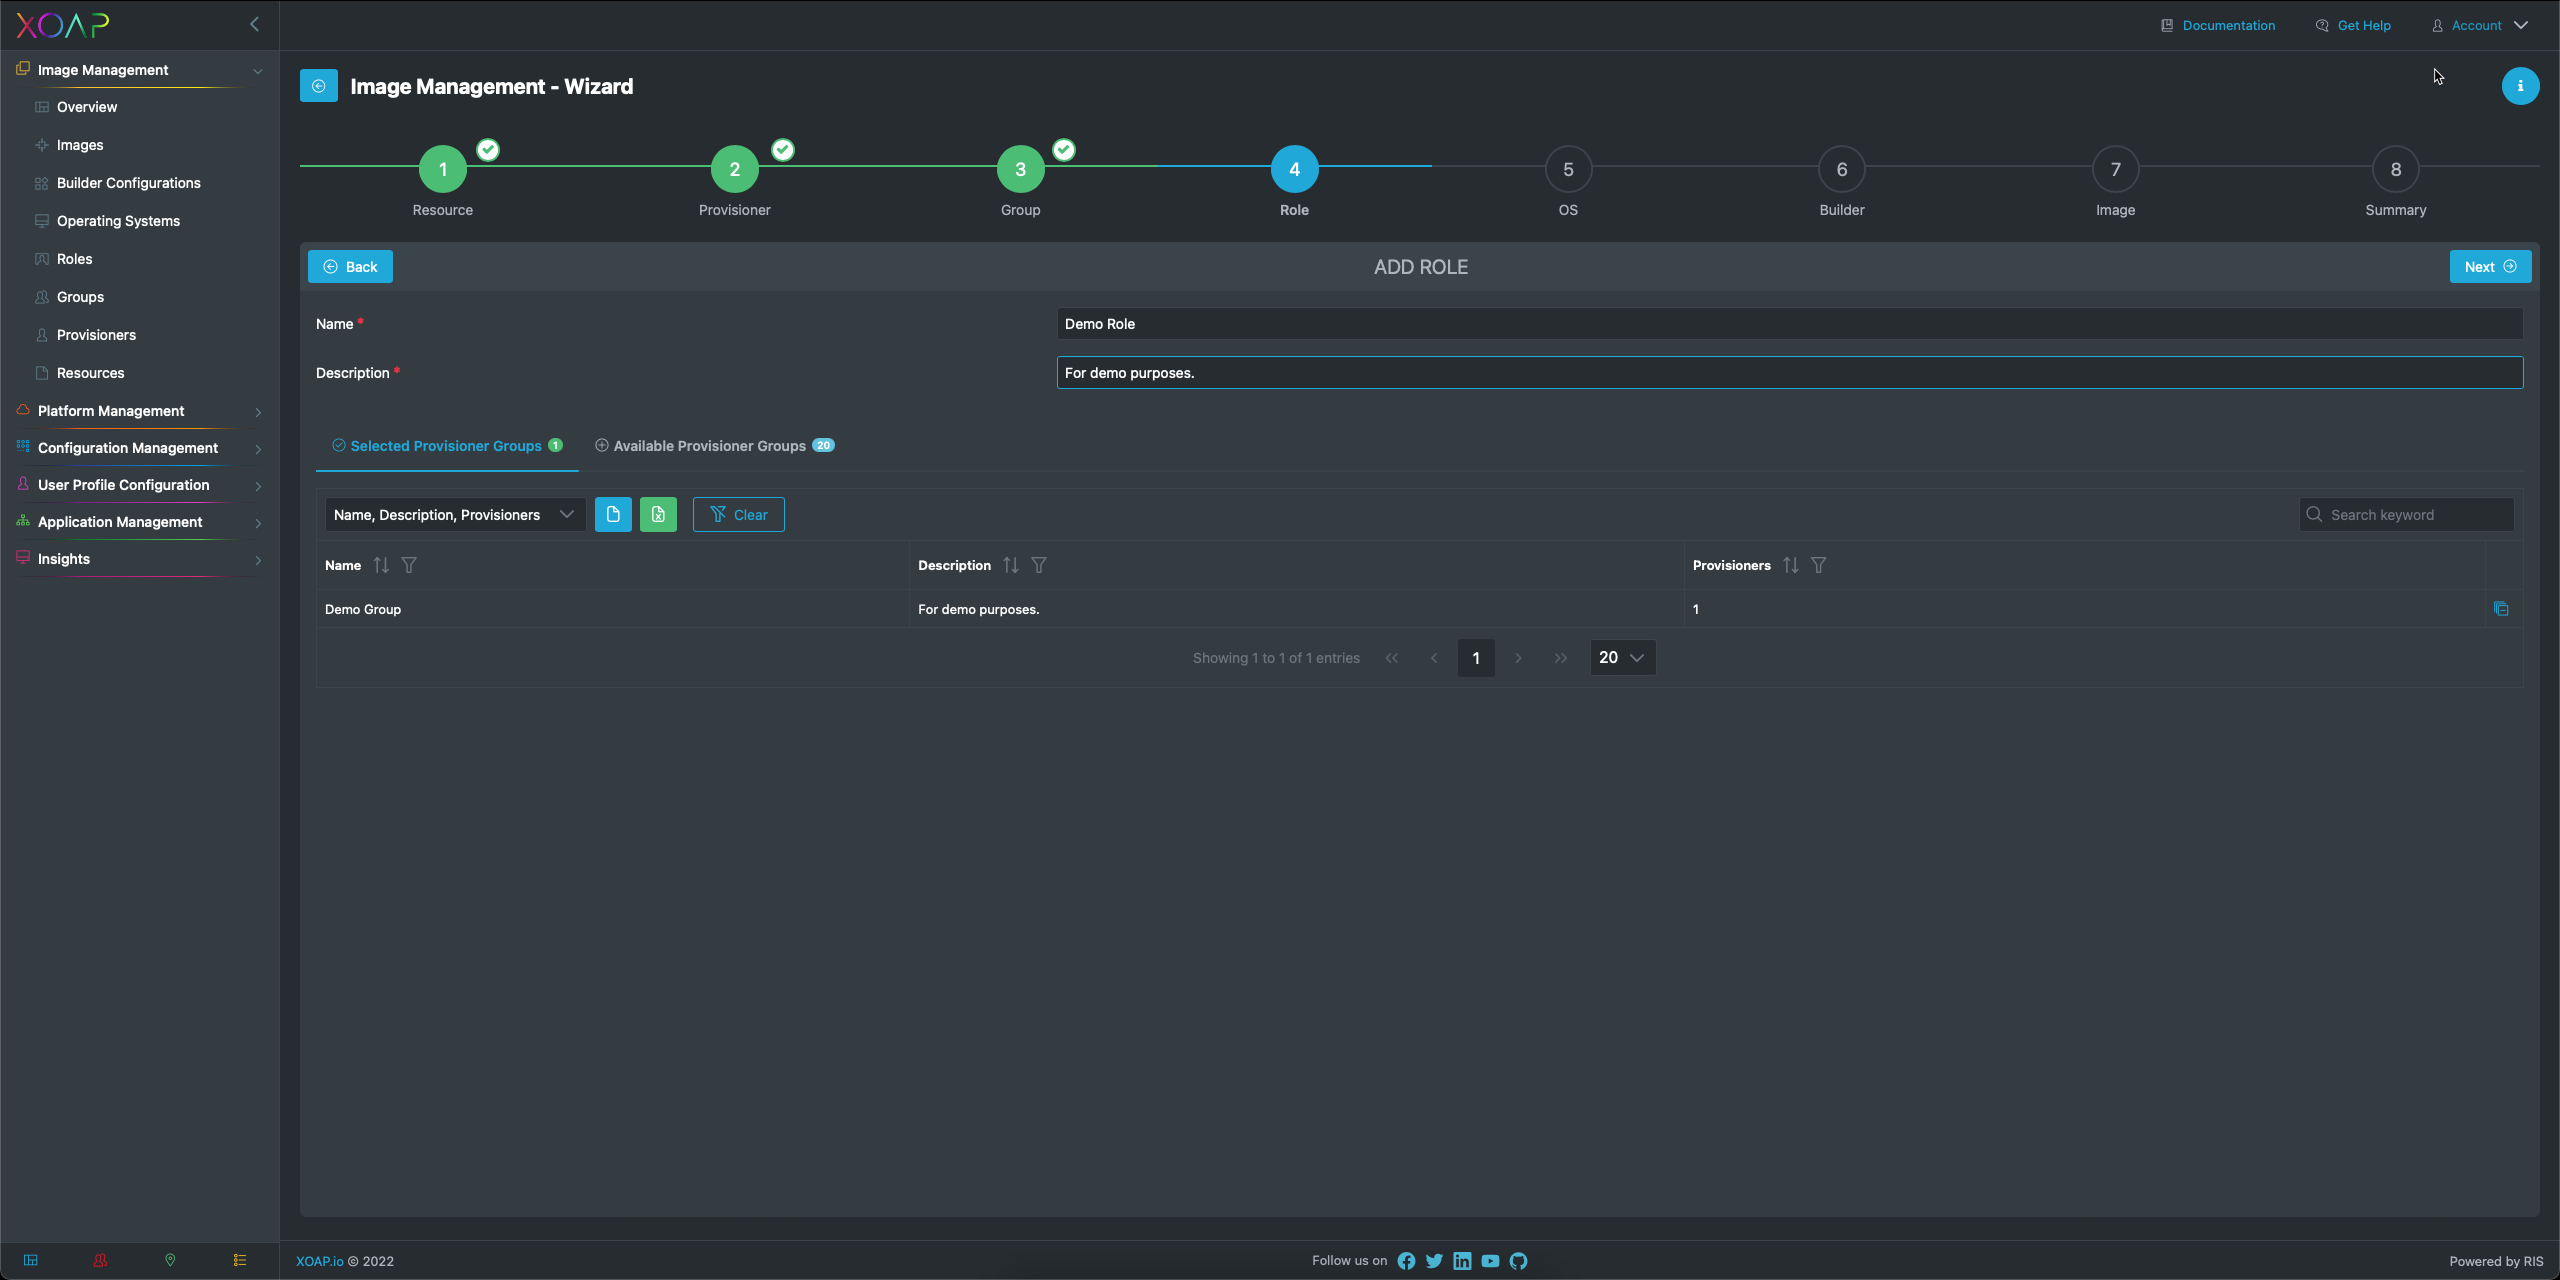
Step 4: Role
Configure the provisioner roles, which allow you to create defined roles for specific use cases. The group created in the previous step is automatically added. Add more groups if needed.
Step 5: Operating System
The next step is to define the operating system items that should be used. In order to continue you can choose between AWS or Azure as provider, select the desired operating system as well as the language. If you already created items you can skip this step.
Step 6: Builder
We will directly proceed to Step 7 by clicking on it.
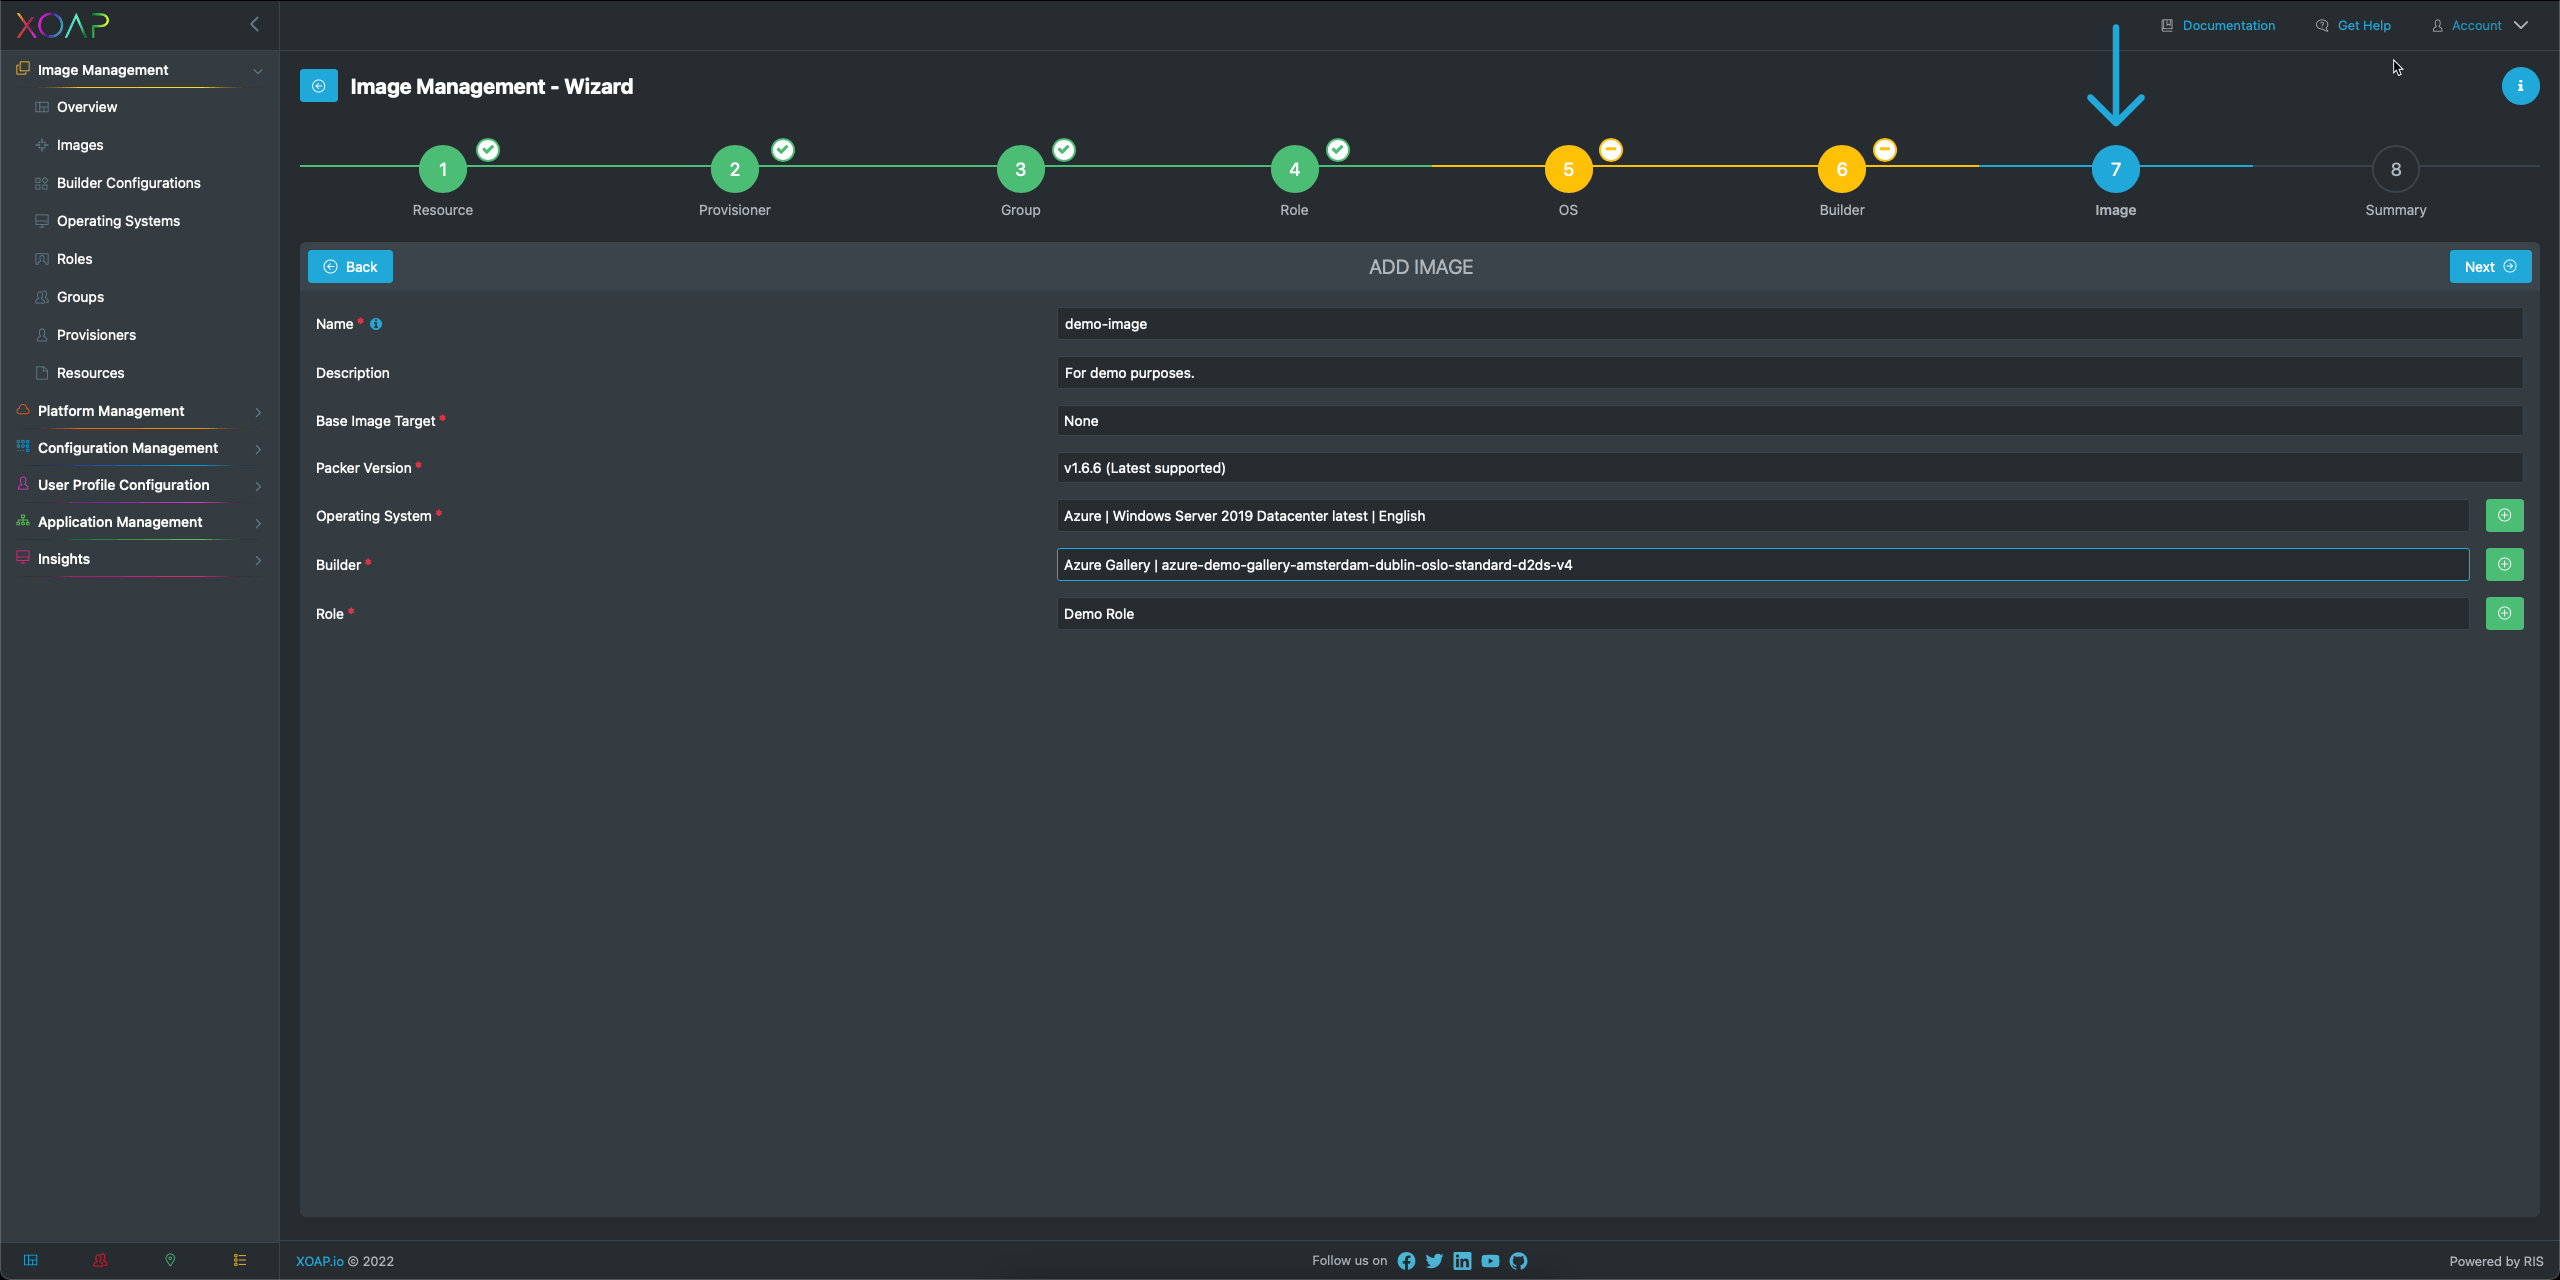
Step 7: Image
This step is the last one to configure your image. Fill in the necessary information and click next once you are done.
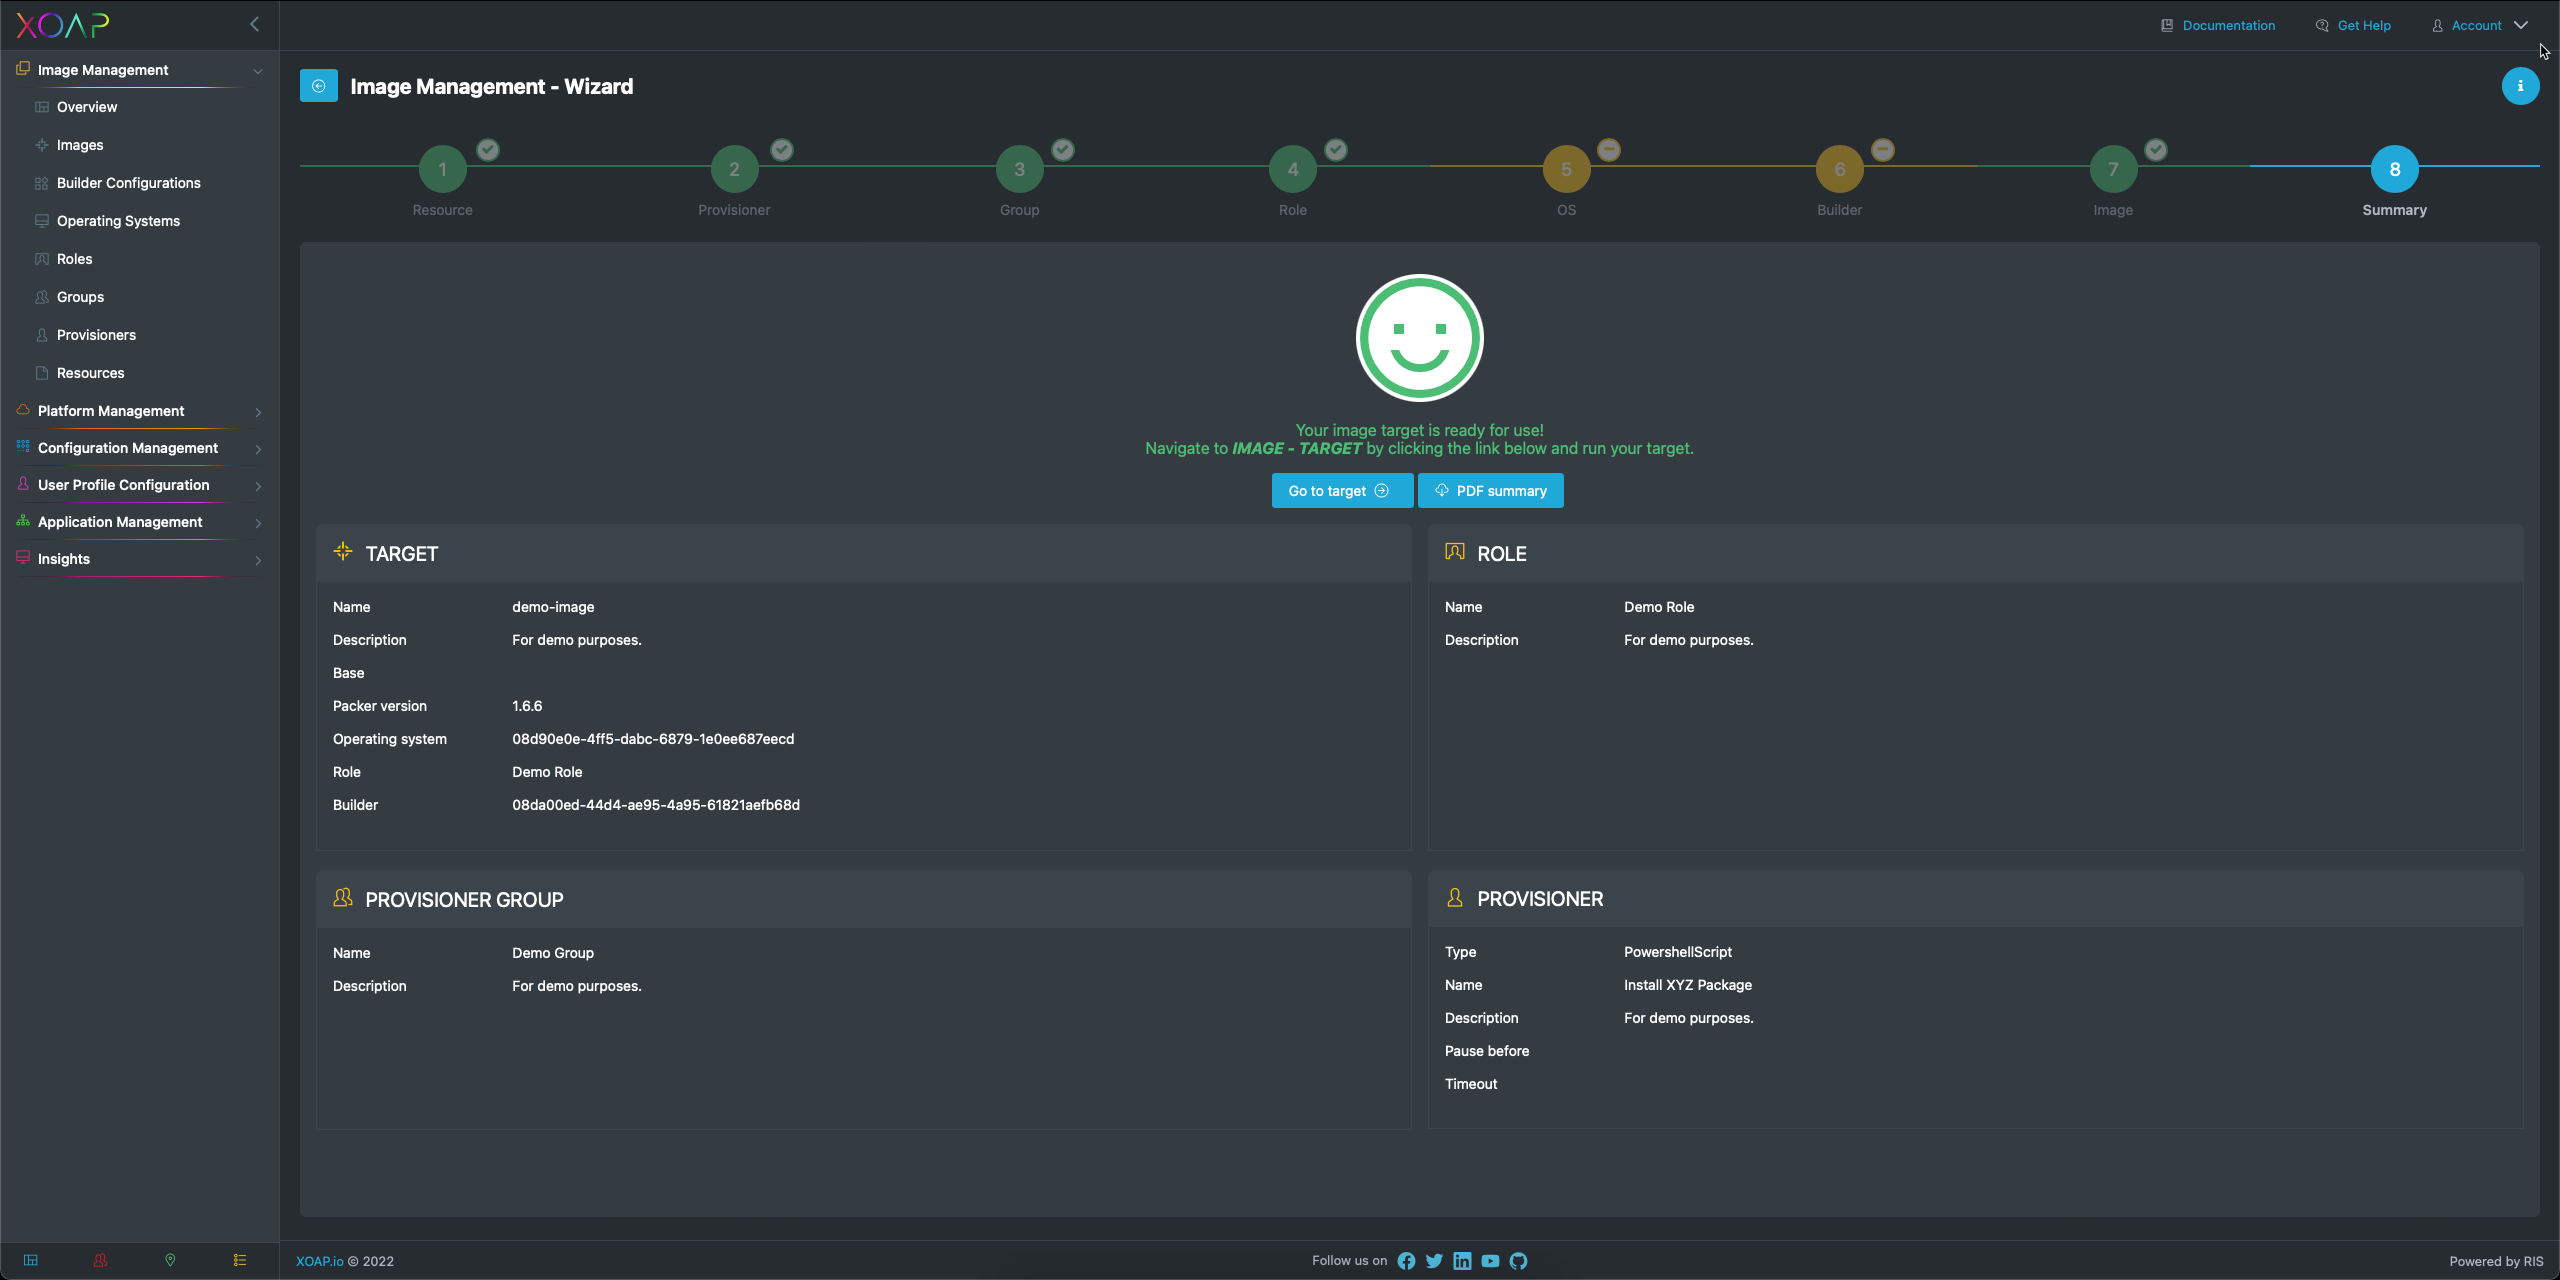
Step 8: Summary
This is it. You will see the summary page and can now run your image.